Showing posts with label Fall. Show all posts

Saturday, October 26, 2024

October Layout Share - My Creative Scrapbook

  Hey everyone. I am so excited to share my layouts created with the October Main kit from My Creative Scrapbook. This amazing kit featured the Cider & Donuts collection from Simple Stories along with some Echo Park Paper Chipboard. Every month the kit also includes a sketch and digital cut files from the Cut Shoppe. Here's what I created ...

1. Happy Fall Y'All - You have to put some fall leaves on a Fall layout, right? I used some old Cheery Lynn leaf dies to create these leaves from various pattern papers and then I arranged them in a wreath. This background paper is from 49th & Market and is  not included in the kit.

Watch my YouTube process video here...


2. Give Thanks - Photos that express gratitude are perfect for scrapping with the Cider & Donuts collection no matter what time of year they were taken. These are photos of my son and his fiancé after the purchase of their first house!! This layout is based on the monthly sketch by Laura Whitaker


3.  Gather Together - We managed to fry a turkey for Thanksgiving last year and didn't burn the house down! Here is the proof. Our turkey was so delicious! I had extra leaves from my first layout so I decided to use them on this layout creating a border. I think I will turn this into a two-pager by flipping the colors around on the new page (give thanks pattern paper, floral-leaf pattern paper, then solid green pattern paper). 

4. Autumn - This layout is all about my love for pumpkin spice coffee.


My Creative Scrapbook puts together 4 kits every month. I used the Main kit for these layouts. Each kit is put together beautifully. There is really something for every kind of scrapbooker! Go check them all out.

Thanks so much for stopping by.
~Marcia


Monday, November 6, 2023

Thanksgiving Tag Bags - Lori Whitlock

Hello everyone!

Can you believe it's November already and in no time it is going to be Thanksgiving! I wanted to make some treat bags for the little ones attending our Thanksgiving dinner. Lori Whitlock’s 2 on 12x12 Tag Bag Pilgrim (SVGSilhouette) and the 2 on 12x12 Tag Bag Indian  (SVGSilhouettewere just what I was looking for. I used the Echo Park Paper I Love Fall collection to create my tags along with a heavy cardstock for the bag.


Washi tape from the I Love Fall collection lines the bottom of the tags. After piecing my pilgrim and Native American girl together, I used some foam tape to adhere them to the tags. I attached the tags to the bags with some raffia paper ribbon.


Lori has lots of other fun Thanksgiving bags and treat boxes in her shop. Go check them all out
.
Thanks so much for stopping by today.
~Marcia

Sunday, October 15, 2023

My Creative Scrapbook October Layout Share

 Hello everyone!

I am so excited to share with you what I created with the October Main kit from My Creative Scrapbook which featured the American Crafts Farmstead Harvest collection along with some pattern papers and chipboard from the Carta Bella Hello Autumn collection. Let me show you what I created ...

1. Thankful - My daughter just bought a house so I was immediately drawn to this house pattern paper and she sent me the cutest photos her realtor took. Watch my process video here for all the details...


2. Hey Pumpkin - When your dog loves Pumpkin Spice Lattes just as much as you, you have to scrapbook it, right? Hear all about Princeton and see this layout come together.


3.  Happy Fall - Best way to enjoy those Fall colors is on out new e-bikes!


4.  Enjoy The Small Things - like Honeycrisp apples from your favorite apple orchard. I used the Vicki Boutin Sweet Rush stencil that was included in the kit to create my own mixed media background. Then I created a pile of leaves underneath my photo. Watch my process video here...


My Creative Scrapbook puts together 4 kits every month. There is something for every kind of scrapbooker! Go check them all out.

Thanks so much for stopping by,
~Marcia

Friday, October 13, 2023

3D Pumpkin Tutorial - Lori Whitlock

 Hello everyone, Marcia here.  Halloween is creeping up and Lori just came out with these spooktacular 3D Pumkins that with a tealight inside make for amazing luminaries. I was obsessed with the lantern luminaries last year and made a bunch to light up my sidewalk for Trick or Treaters. I couldn't wait to add to my collection with the 3D Pumpkin Black Cat (SVGSilhouette). As a crazy cat lady with two black cats, the cat choice was a given. If you are not a fan of cats, check out her other designs in the store.


This looks complicated but I promise you it is easy to make. Let me show you how.

1. Choose your papers and cut out all the pieces. I chose to make an all black pumpkin, but these look great in white or orange as well.


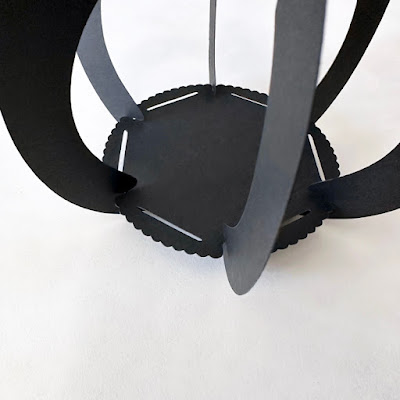
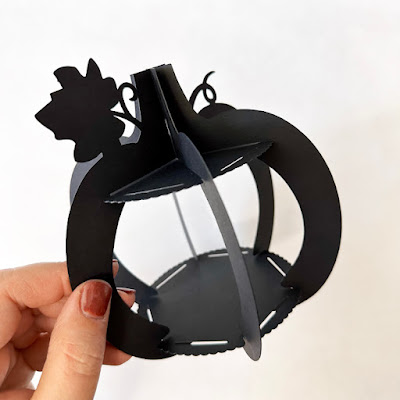
2.  The three pumpkin shaped pieces have notches cut in the stem and at the bottom. Carefully slip one pumpkin inside the other and attach two of the pumpkin pieces together at the stem using the notches and then at the bottom doing the same. Now add the third piece in the same manner. The pumpkins should be able to lie flat after connecting.


3. Spread the pumpkin out. Using one of the round disks, place it inside the pumpkin at the base matching up the notches.


4.  Take the second disk and place it inside the pumpkin at the top, again matching up the notches.


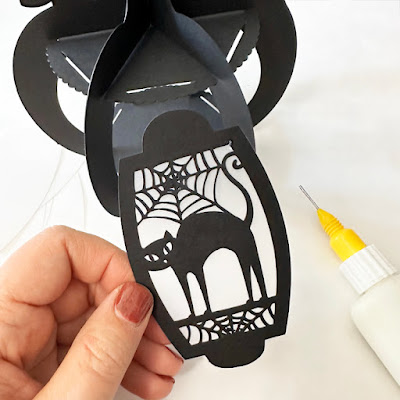
5.  Adhere the vellum pieces to the back of each panel. Go light on the glue to prevent it seeping out where it can be seen.


6.  Curl the panels a bit before inserting the bottom portion of the panel through the slot in the disk at the base of the pumpkin. Then place the top of the panel through the slot at the top.


7.  Repeat for each panel. Add an optional tealight before placing the last panel. I chose to add some raffia grass to the top of my pumpkin.


Be sure to check out all the new 3D Pumpkin designs. They are all spooktacular!

Thanks so much for stopping by! Have a great week,
~Marcia

Tuesday, October 3, 2023

Happy Fall - Lori Whitlock

 Hello everyone. 

Fall is officially here and I will soon be venturing to our local pumpkin patch with the family for some fun activities. For Fall wishes, The Lori Whitlock's Pumpkin Truck Back Box Card (SVGSilhouette) is so festive. It reminds me of those trips to the pumpkin patch.


I created my truck from cardstock and added some solid pattern papers from the Echo Park Paper I Love Fall collection. I couldn't resist adding the little racoon to my truck bed. He was cut from a die cut ephemera piece also from the I Love Fall collection. 

I know this card will put a smile on someone's face! Best of all it folds flat for mailing. Lori has lots of other fun Fall cards in her shop. Go take a look.

Thanks so much for stopping by today.
~Marcia

Tuesday, September 7, 2021

Fox Belly Box - Lori Whitlock

Hello blogging friends! 

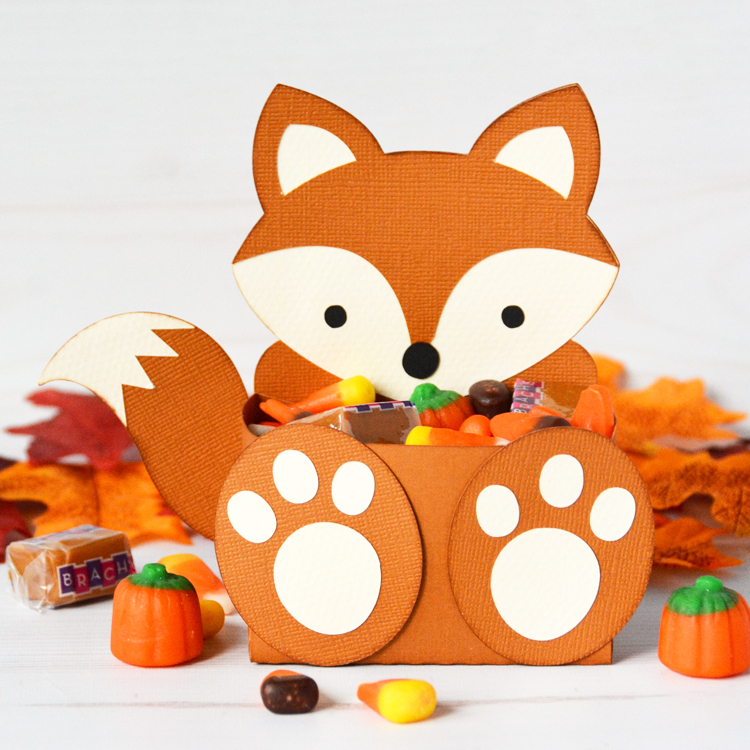
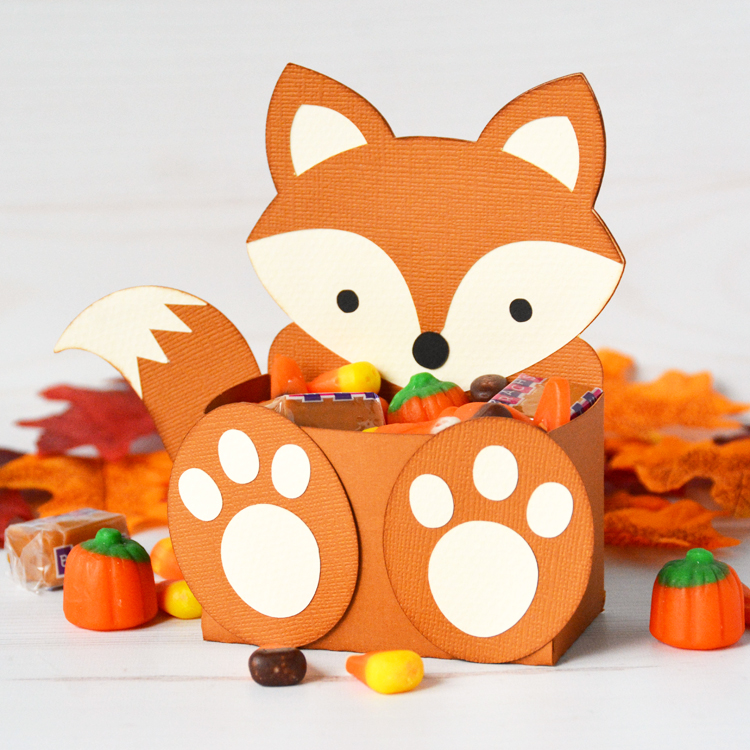
Now that September is here I am starting to think of Fall papercrafts to make. This little Fox Belly Box (SVGSilhouette) from Lori Whitlock would make an awesome party favor, gift, or adorable table decor.  Fill it's belly with your favorite fall candy.

If foxes aren't your thing, there are lots of other animal belly boxes just as adorable. Check them all out in Lori's store. 

Thanks so much for stopping by.
~Marcia

Saturday, October 12, 2019

Halloween Party with Pebbles!

Hello blogging friends! 

I love throwing Halloween parties. It’s fun to decorate the house and invite people over whether its a pumpkin carving party or a Halloween costume party. Of course, part of the fun is creating some party favors to help set the mood. Here is what I came up with using the This is Family collection that Jen Hadfield designed …


Even though this collection is not Halloween based, the colors of the pattern papers have a Fall air about them and I had no problems making them work. The kids will get a kick out of these pumpkin treat bags. I used a svg cut file from SVGcuts called Barn Party. These treat bags could be filled with candy or even popcorn. A clear acetate sheet let’s you see just what treats are inside.


I also spray painted the outside of some pint sized mason jars to look like candy corn. A trick here to prevent overspray is to wrap some scrap paper around the jar and affix with a rubber binder. I spray painted my jars with the opening face down to prevent getting any paint inside the jar.


Once the paint was dry I cut faces from black vinyl to adhere to them.


Box cards make great table decor on your buffet table. This Jack-In-The-Box black cat isn’t too scary. I have a couple of black cats that I took in as strays so it was hard to resist making this one. This svg cut file is also from SVGcuts and is called Halloween Box Cards. It does fold flat in case you wanted to mail it.


I hope this gives you some ideas if you are planning on throwing a Halloween party. This Is Family papers and embellishments are sold through American Crafts. You can also get the This Is Family collection at JoAnn Fabric Stores!  

SUPPLIES:734162 This is Family Patterned Paper Fresh Picked

734164 This is Family Patterned Paper Bike Ride
734167 This is Family Patterned Paper Picnic
734168 This is Family Patterned Paper We Are Family
734170 This is Family Patterned Paper Fall Time
734175 This is Family Patterned Paper Growing Together
734181 This is Family Patterned Paper Chit Chat
734183 This is Family Patterned Paper Tag You’re It
734196 This is Family 6×8 Paper Pad with Copper Foil Accents
American Crafts Cardstock in black


Thanks so much for stopping by!
~Marcia


Monday, October 7, 2019

Trick Or Treat | PageMaps

Hello blogging friends!

I can't believe its October already! That means there is a new set of PageMaps sketches available! I love working with Becky's sketches, especially when I have been in a scrapbooking funk. You can concentrate on photos and papers instead of design. The October sketches are so inspiring too. Here is the one I used...


I liked that this had three photos. I could do a layout of all three of my kids. These photos are from years ago. My kids are all grown up now and off on their own. I converted my photos to black and white to coordinate better with my Simple Stories Vintage Halloween papers. I really stuck to the sketch on this one too ... when you see a great thing, don't mess with it, lol.


This might look like I did a lot of layering, but really I didn't. The stickers in this collection are already layered. I just added some foam tape behind them for dimension. Then I layered some cute flair from A Flair For Buttons, added a bow and some enamel dots.


I still love sewing on my paper using a machine and distressing the edges of my papers. I used washi tape above and below my photos and some black spray mist behind my title to help it pop more.


A Martha Stewart spider web border punch was a fun touch to add. Some sticker bats and black ink splatters help draw the eyes from bottom left to top right.


I really love how this turned out. Go check out the other sketches. They will make you want to scrap your heart out again. Unfortunately, this collection is not available anymore but you can find others here ... Simple Stories Halloween at Scrapbook.com

~Marcia


Tuesday, September 10, 2019

Hello Autumn - Pebbles

Hello blogging friends!

I am here today with some inspiration on how you can use your scraps to create a layout. This layout was completely created with scraps from the Pebbles This is Family collection by Jen Hadfield. I love the mix of colors in this collection and thought it would be beautiful to use my scraps to back an Autumn cut file.


I found this cute fox and Autumn title in the Handipaper Etsy store. It did take me a while to back these two cut files but it was so worth it. There are a few tricks you can use to make it a little easier. I was able to separate out the letters from the cut file (try Ungroup or Release Compound Path in Silhouette Studio). This allowed me to use the offset feature and cut them from pattern papers slightly bigger than the openings. Autumn is a colorful season so I wanted to include lots of different colors and patterns to back my cut files... scraps are perfect!


It is difficult to see just how pretty that foiled Hello ephemera piece is. The rose gold foil is perfect for fall. I love the transparent ephemera pieces as well. A few fussy cut leaves look great on my mixed media background. I used one of the tags from the tag pad to journal on and tucked it behind my photo. I often hide my journaling using these tags.


Does this layout have you craving all things fall; cozy sweaters, cute scarfs and boots, pumpkin spice lattes, apples, and beautiful colorful leaves. I sure am. Thanks so much for stopping by. I hope you try this technique with some of your scraps too.


Supplies:
340272 Sticky Thumb Adhesive Foam Dots
71793 Smooth Cardstock White
734162 This is Family Patterned Paper Fresh Picked
734165 This is Family Patterned Paper Sending Love
734167 This is Family Patterned Paper Picnic
734168 This is Family Patterned Paper We Are Family
734170 This is Family Patterned Paper Fall Time
734172 This is Family Patterned Paper Home Sweet Home
734173 This is Family Patterned Paper Family Life
734174 This is Family Patterned Paper Flower Patch
734175 This is Family Patterned Paper Growing Together
734176 This is Family Patterned Paper Golden Field
734177 This is Family Patterned Paper Scattered Leaves
734180 This is Family Patterned Paper House Plants
734183 This is Family Patterned Paper Tag You're It
734184 This is Family Patterned Paper Bits & Pieces
734188 This is Family Tag Pad
734190 This is Family Ephemera

Saturday, August 10, 2019

Back 2 School

Hello Pebbles friends! Marcia here today with a Back 2 School layout. I love to see the excitement on little kids faces as they head off to school for the first time. They are so happy that they are finally old enough, especially if they have been watching older brothers and sisters head off to school. Too bad that excitement wanes as they get older. I captured that excitement in a scrapbook layout I created with the new This is Family collection by Jen Hadfield.


I used a new back to school cut file by Paige Evans. I love this stack of books with the title placed carefully in the pages. I backed the bookcovers in the cut file with beautiful pattern papers. Then I fussy cut a house from one of the pattern papers. It reminds me of a little red schoolhouse.


There is this cute caterpillar on top of the books.


I figured this snail die cut would fit right in.


I created dimension by fussy cutting out leaves from the pattern paper and adding foam tape behind.


I hope your kids are excited to head back to school. Have a great week!


Supplies:
This is Family Patterned Paper
This is Family Ephemera

Monday, October 22, 2018

Pumpkin Carving - JustNick Studios

Hello blogging friends!

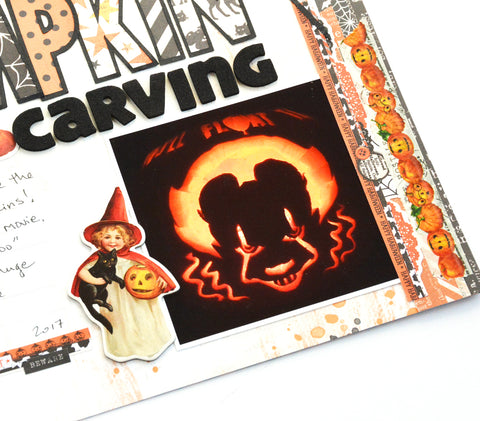
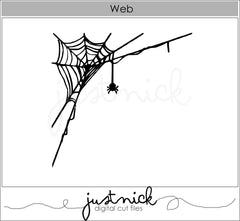
I am back today with some Halloween inspiration for you using some JustNick Studio digital cut files. Do you have your pumpkins ready to carve? My son Trenton takes pumpkin carving very seriously. Last year I helped him create a stencil of the clown from the movie It using my Silhouette Cameo. It's a little hard to tell from the picture, but above the clown are the words You'll Float Too. This pumpkin was so popular last Halloween my Trick or Treaters (and their parents) were taking photos of it. I can't wait to see what he is planning to carve this year. I used the new Web digital cut file to add some creepiness to a corner. I love that big black spider hanging down.


For my title, I used my favorite Outline Alphas and backed the letters with different pattern papers.


Here is a close up of that clown all lit up ...  Be sure to check out the eyes. Awesome, Right?


Here are the digital cut files I used today...


Thanks so much for stopping by. Have a great week!!