Showing posts with label punches. Show all posts

Tuesday, June 16, 2020

Carb Loading - My Creative Scrapbook

Hello blogging friends!

Last fall my daughter ran in her first half marathon in Chicago. It was a good excuse for a Mother - Daughter trip. The day before the race, we were out carb-loading ... Chicago deep dish pizza is so so good! This 3rd layout with the My Creative Scrapbook June Main kit features the Simple Stories Going Places and the Vicki Boutin Let's Wander collection.


I added a mixed media background from Vicki Boutin's Let's Wander pre-made mixed media paper pad. This red and yellow background reminded me of pizza, lol. In the die cut ephemera pack was this guest check, perfect for documenting all the yummy things we tried.


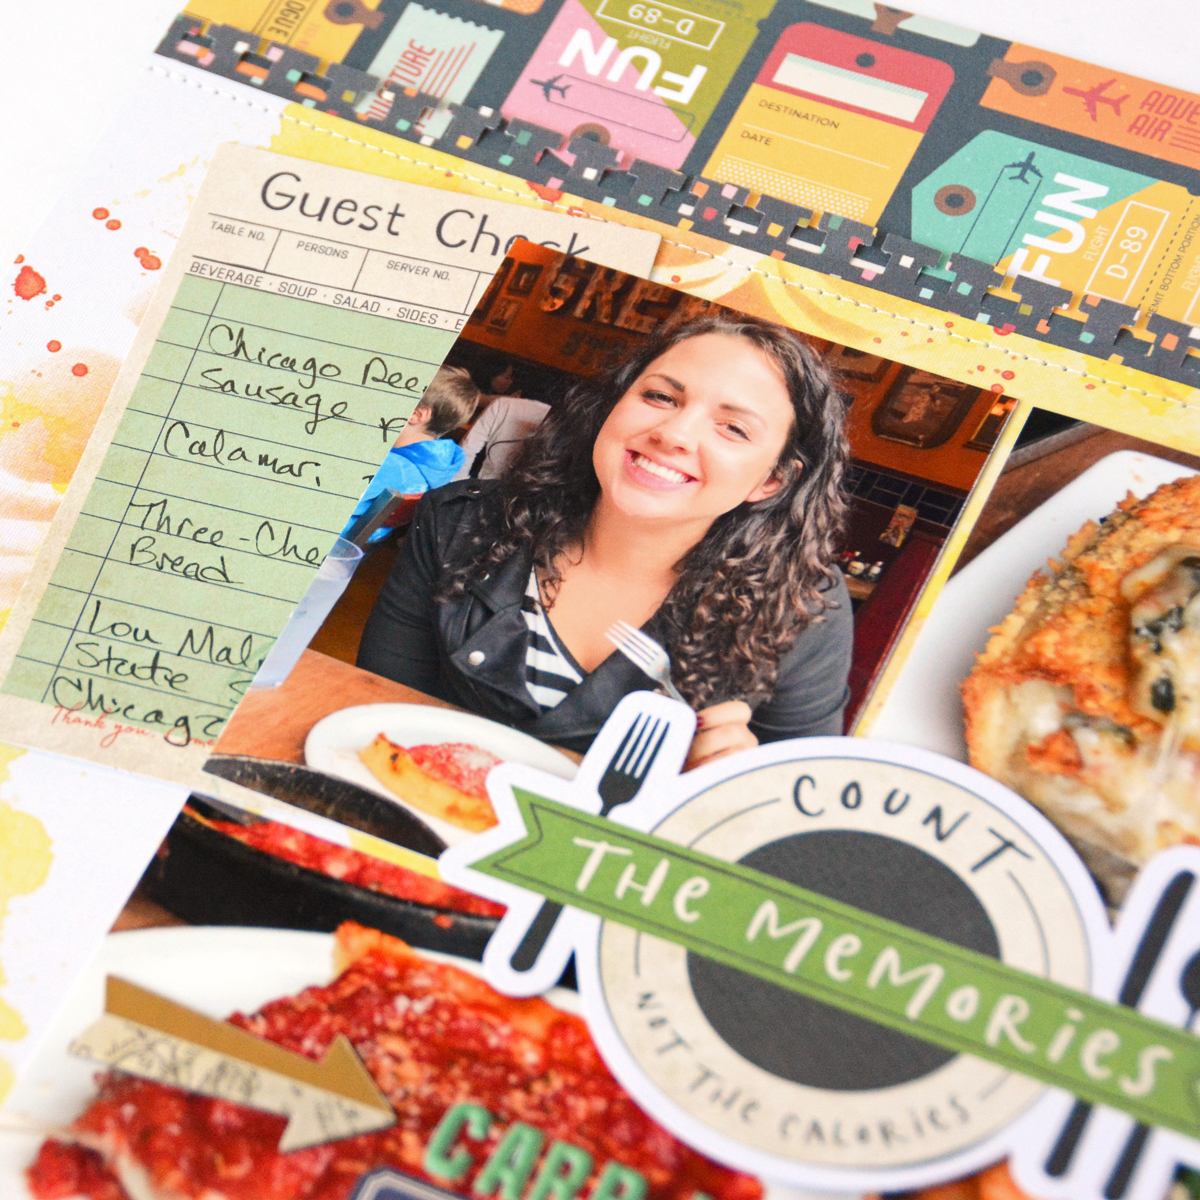
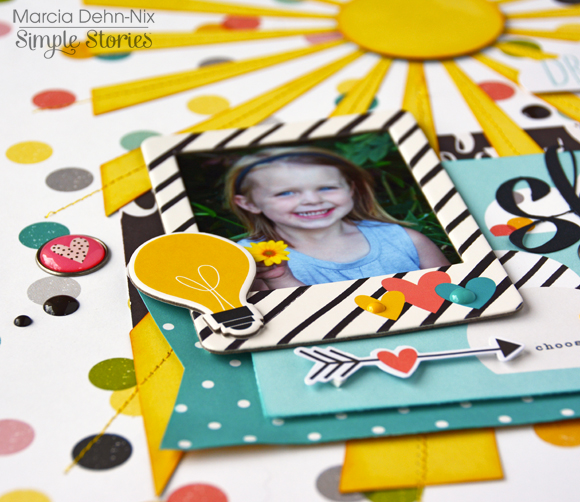
My design makes use of a grid for my photos. This Count the Memories die cut was another perfect choice. I added the Carb Loading sub-title underneath.


 Another cluster of food die cuts appears in the opposite corner from the Guest Check. Since trying local foods is a huge part of vacations, I love all the food icons and phrases in the Let's Wander collection.


Be sure to check out the My Creative Scrapbook kit club. These kits are packed with full of awesome goodies.

~Marcia

Wednesday, June 10, 2020

Just Me - Pebbles

Hello blogging friends!

Each Pebbles designer has been introducing themselves this past week. I thought I would introduce myself by creating a layout about my 20 favorite things for 2020 so you could get to know me a little better. The Pebbles Hey, Hello collection was the perfect choice!


Since flowers are one of my favorite things (I have flower gardens all around my house) I fussy cut some flowers from one of the gorgeous floral pattern papers in the Hey, Hello collection and placed them at the top and bottom of my layout.


Since I love my fur babies, it seemed fitting to add this adorable cat ephemera die cut in the flower cluster at the bottom. We currently have 3 cats and 2 dogs in residence. I was a foster Mom for a local rescue until recently. So a few of our pets were foster failures. We just could not part with them. A few were strays. It seems I have a knack for attracting them as well. Spook, the black cat on my shoulders in the photo, has a special place in my heart. I had to nurse him by hand as a kitten through a respiratory infection.


What else do I like? Coffee, Avocado Mango Power Greens Smoothies, listening to audio books so I can keep up with my bookclub, and spending time with friends and family are just a few ...


I live in Minnesota with my husband of 36 years! Together we managed to raise two very successful girls and one amazing boy. They are all out on their own now. (Which is why I needed fur babies to fill up the empty nest.) By day, I am a software engineer. At night I like to play with pretty papers. I have been scrapbooking for almost 20 years. Scrapbooking branched into cardmaking, paper crafts, and some home decor as well.


I hope you will try creating a 20 favorite things layout for 2020 as well. It's good to see how our likes change over the years. Thanks so much for stopping by.


Supplies:
Pebbles – Hey, Hello – 12 x 12 Paper Pad
Pebbles – Hey, Hello – 12 x 12 Patterned Paper Happy Day
Pebbles – Hey, Hello – 12 x 12 Patterned Paper Floral Friends
Pebbles – Hey, Hello – 12 x 12 Patterned Paper Flower Blossoms
Pebbles - Hey, Hello - Thickers
Pebbles - Hey, Hello - Cardstock Stickers
Pebbles – Hey, Hello – Die Cut Ephemera


Monday, June 1, 2020

Nothing But Love - Pebbles

Hello blogging friends!

This week at Pebbles the focus has been on monochromatic projects. My first thought was to fussy cut out a bunch of pink flowers from one of the beautiful floral pattern papers Pebbles is so known for. I had many options to pick from but ended up selecting a pattern paper from the Lovely Moments collection. I liked that there were three different pink flowers in this pattern that could easily be fussy cut out. I also wanted a simple background so my flowers would get all the attention. This black and white polka dot was perfect.


Underneath the fussy cut flowers I placed stems and leaves cut from a white cardstock. Partial flowers can be tucked behind a photo. The floral clusters that were intact were placed over my photo using some foam adhesive to give dimension. You can see I also added some flower stickers and puffy dots to the background.


I created my title by combining the “Nothing But” phrase Thickers with the larger “LOVE” Thickers, arranging them along the top of my photo and then down the side. I like how the two font sizes add interest.


In the die cut phrase ephemera pack I found this card, “I’m so glad I found you”. I thought it was appropriate for my layout. My daughter found her dog Nana at the Humane Society and she fell in love with her! I upped the cuteness factor by adding this adorable bunny as well.


I love how soft and feminine this layout turned out. Take another look at your floral pattern papers and give fussy cutting a try. I think you will be happy with the results too.


Here is a look at my process and additional information about some of the tools I used ...


Thanks so much for stopping by today.

Monday, October 7, 2019

Trick Or Treat | PageMaps

Hello blogging friends!

I can't believe its October already! That means there is a new set of PageMaps sketches available! I love working with Becky's sketches, especially when I have been in a scrapbooking funk. You can concentrate on photos and papers instead of design. The October sketches are so inspiring too. Here is the one I used...


I liked that this had three photos. I could do a layout of all three of my kids. These photos are from years ago. My kids are all grown up now and off on their own. I converted my photos to black and white to coordinate better with my Simple Stories Vintage Halloween papers. I really stuck to the sketch on this one too ... when you see a great thing, don't mess with it, lol.


This might look like I did a lot of layering, but really I didn't. The stickers in this collection are already layered. I just added some foam tape behind them for dimension. Then I layered some cute flair from A Flair For Buttons, added a bow and some enamel dots.


I still love sewing on my paper using a machine and distressing the edges of my papers. I used washi tape above and below my photos and some black spray mist behind my title to help it pop more.


A Martha Stewart spider web border punch was a fun touch to add. Some sticker bats and black ink splatters help draw the eyes from bottom left to top right.


I really love how this turned out. Go check out the other sketches. They will make you want to scrap your heart out again. Unfortunately, this collection is not available anymore but you can find others here ... Simple Stories Halloween at Scrapbook.com

~Marcia


Saturday, May 18, 2019

Dandelion Wishes - PageMaps

Hello blogging friends!

I know National Scrapbook Day was a few weeks ago ... but I am trying to catch up on my blogging after being sick for a few weeks. Becky Fleck from PageMaps asked me to be a guest designer for May with some special sketches for National Scrapbook Day. I love working with Becky's sketches. Here is the awesome one she sent me...


I found a beautiful cut file in the Silhouette store that I was dying to use. It's called Dandelion Wishes and is from Jillibean Soup. I used the Spoonful of Soul collection, also from Jillibean Soup to create my layout and I had the sweetest photos to scrap.
 

I did some computer journaling and double cut my title to give it a shadow effect. For the wishes portion of my title, I used alpha stickers and stitched over the top to give it some texture. I love the dandelion sticker I placed behind my title.


I pulled out an old border punch to create an interesting contrast with a striped pattern paper over the top of this gorgeous floral pattern paper and beautiful blue pattern paper. I added some stickers to the bottom right of my photo to correlate with the sketch.


The cut file backed in white creates quite a contrast against the blue pattern paper. I used markers to color in the dandelions and added a few splatters of white spray mist.


The photos were mounted using foam adhesive for dimension. I just love how this layout turned out!

Be sure to check out the other PageMaps sketches for May.

~Marcia

Thursday, August 2, 2018

To The Moon - Simple Stories

Hello blogging friends!
I am back today with a cute Simple Stories Oh, Baby layout for you. I am smitten with the soft pastel colors in this collection making it perfect for either boys or girls. Today I am scrapping this hospital photo of my cute little nephew.

The main focus of my layout is this To The Moon digital cut file from JustNick Studios cut from the yellow gingham pattern paper. I used the star openings to do some string art. I love the texture it adds. This chipboard sticker bear is just adorable, isn't he.


I trimmed my photo to be heart shaped to fit the cut file heart dangling from the moon and added a chipboard sticker bow where the heart is connected to the moon.
To add interest to the background, I used a cloud stencil and blue distress oxide ink to create some fluffy blue clouds. The stars leftover from the cut file were then scattered across my page along with some star stickers.

Along the right edge of my layout I added the tape measure paper. To soften things, I also added a punched eyelet lace edge. Over this I placed a cloud and this adorable bear riding in a hot air balloon.


Thanks so much for stopping by. Be sure to check out my YouTube process video ...


Supplies Used

Thursday, May 10, 2018

Be You - Jillibean Soup and Therm O Web

Hello blogging friends!

I have a new Jillibean Soup layout to share with you today. Jillibean Soup teamed up with Therm O Web and I was thrilled to combine their products with the beautiful Bohemian Brew collection. I had fun experimenting with the Deco Foil and my new Minc thermal laminator. If you don't have a thermal laminator, you can still use Deco Foil with this awesome mixed media adhesive tape. You can see both methods on this layout where I am scrapping a senior photo of Colette. I couldn't resist. The colors and patterns in Bohemian Brew made me think of this dress my daughter wore for some outdoor senior photos.


At this angle you can see how beautiful that foil looks! I used the blue Deco Foil on the mixed media tape and then punched the foil with a border punch. The hot pink Deco Foil I used on a Jillibean Soup digital cut file. Isn't that mandala awesome! I had some cardstock sheets I printed so they were full of toner so I could run them through my Silhouette Cameo and cut out anything I wanted before running it through my new Heidi Swapp Minc. Here is a closer look.


I used a combinations of stickers and soup labels to create my title, 'Be You'. The puffy sticker flowers were great to add some dimension.


I clustered a bunch of pea pod parts in the lower left corner of my photo. There are actually 3 mandala cut files stacked on top of eachother. I even had a 4th one cut out but thought it might be too much.


If only that foil would photograph beautifully from every angle! It was a challenge. Here is the full layout.


If you are interested in my process or seeing me make mistake after mistake playing with my new Minc, here is my YouTube process video.


I am giving away some Therm O Web product over on my YouTube channel. Just follow my channel and leave a comment there. Winner will be posted on May 12th.

Thanks so much for stopping by!
~Marcia


Wednesday, April 13, 2016

Make Today Ridiculously Amazing - Simple Stories


Hello blogging friends! I am so excited to share some Simple Stories Carpe Diem layouts with you today. This collection is gorgeous with those bright colors mixed with the black and white pattern papers. 

For my first layout, I really wanted to make a pretty, girlie scrapbook page that showcased the beautiful floral pattern paper. The title for this layout Make Today Ridiculously Amazing comes from one of the Bits & Pieces elements. It really goes with the theme of this collection, Seize the Day. Take a look ...


I used a piece of black cardstock as my background and used the diagonal pattern paper as a border. I think the black really makes those bright colors pop. I softened the look with a white die cut doily and also some white die cut leaves and flowers, Sprinkled among the pretty die cuts are some Carpe Diem Bits & Pieces, Bradz and Enamel Dots. Digital cut files for the die cuts came from JustNick and 17Turtles.


A Chipboard Frame tucked in under the lower right of the photo helps to frame it. There are lots more Bits & Pieces here along with more Bradz, Enamel Dots, and a sweet little twine bow.


With so much layering at the top, I left the bottom half of my layout clear of embellishments so you can really appreciate that pretty floral pattern.


For my second layout I wanted to showcase the fun side of the Carpe Diem collection and I mixed in a piece of yellow from the Life in Color collection. This one is titled Shine Bright. What could shine more than the sun? so I added a big die cut sun on my layout.


I love adding machine stitching on my layouts. Here I stitched the sun rays.


A Chipboard Frame made a nice frame for my photo. Look how fun this chipboard lightbulb is!


I love layering the 4x6 Element pattern paper pieces. This one had an adorable quote choose to Shine. My title Shine Bright is a combination of a Silhouette die cut and the Carpe Diem alpha stickers. 


Thanks for stopping by today. I had so much fun playing with this collection. I know you will love it too. 


Products Used:

Carpe Diem

Life In Color