Hey everyone. I am so excited to share my layouts created with the December Main kit from My Creative Scrapbook. This amazing kit featured the Vicki Boutin Wrapped In Ribbons collection from American Crafts along with some Echo Park Paper stickers and Simple Stories Foam Phrase Stickers. Every month the kit also includes a sketch and digital cut files from the Cut Shoppe. Here's what I created ...
1. Christmas Fun - This layout features the December cut file Christmas Fun designed by The Cut Shoppe. I decided to go big with my title. Watch my process video to see how I created that sparkling starry background.
2. Let's Be Merry - This layout was inspired by the die cut ephemera piece in the Wrapped in Ribbons collection of a kitten in a gift box. My photo has my cat Spook photobombing this shot of my husband and myself. Watch how this stunning wreath with 3D elements came about.
3. Oh What Fun - I needed to document some photos from our recent trip to visit our daughter in Colorado. This layout was based on the monthly sketch by Laura Whitaker.
and the sketch ...
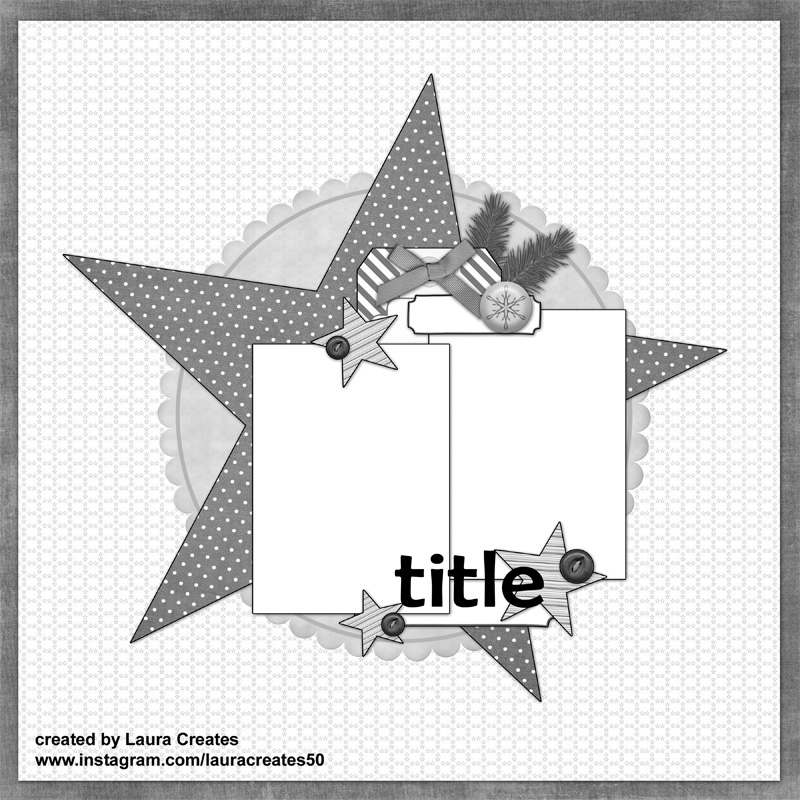
I added some snowflake canvas flair from Scrappin' Happy Studio. These were not included in the kit.
4. Hello Holidays - It was the perfect title to document the start of Christmas baking.
Be sure to check out the special Holiday kits for sale in the shop now!
My Creative Scrapbook puts together 4 kits every month. I used the Main kit for these layouts. Each kit is put together beautifully. There is really something for every kind of scrapbooker! Go check them all out.
The beautiful My Creative Scrapbook May Main Kit featured the Sunny Blooms collection from Pebbles. While the die cut images are geared towards gardening and Easter, it's a versatile collection and can be used for every day and vacation photos as you will see. I made a kit unboxing video you can watch here...
Let me show you what I made with this pretty kit...
1. Explore - With this cloud pattern paper, I knew exactly what photos I wanted to scrap. The negative strip is an altered cut file from The Cut Shoppe and it is included with you kit subscription.
You can watch my YouTube process video here ...
2. Happy Heart - I had to scrap some Easter pics of my grandson with this adorable pattern paper with the bunnies.
You can Watch my YouTube process video here ...
3. Fixer Upper - This layout was inspired by this polaroid cut file from The Cut Shoppe. It is included with your kit subscription. I thought it would be a great way to document my daughter's first house purchase (a fixer upper) and her home projects that made her house a home. I'm not so happy with my journaling ... wish I had done computer journaling instead, but I tell myself it is important to hand write sometimes.
4. Blossom - I had to include a gardening layout with all the stickers and die cuts that are geared towards gardening. I LOVE my flower and vegetable gardens!
5. Memories Together - With the papers and embellishments I had left, I thought I could scrap these fun photos of my daughter holding her nephew for the first time. This time with computer journaling, lol.
My Creative Scrapbook puts together 4 kits every month. I used the Main kit. Each kit is put together beautifully. There is really something for every kind of scrapbooker! Go check them all out.
I have long been a fan of Miss Kate Cuttables cut files, but did you know she now has a monthly subscription box? She asked me if I would help her promote her new monthly subscription kits and I jumped at the chance. She sent me the April Birthday Wishes kit and I couldn't wait to play with it. Want to see what is in the kit? Watch my kit unboxing here ...
I love the bright happy colors and whimsical animals in the kit. In addition to the pattern papers, the kit includes a pack of coordinating solid colors. They cut beautifully with my Silhouette Cameo and my metal dies. Here is a process video of a birthday layout for my grandson's first birthday party. I cut out tons of stars using nested star metal dies.
I also wanted to make some shaped birthday cards using some Miss Kate Cuttable cut files. The solid coordinating colored paper really came in handy for these.
Subscribe / Shop here - https://www.misskatedesigns.com/
The Basic kit is $24.99 and includes 20 sheets of double sided pattern papers, die cut ephemera, and a sticker sheet.
The Cardstock Lovers kit includes everything in the Basic kit plus 32 sheets of coordinating solid colored pattern papers.
You can even skip a month if you think you will be too busy or are out of town. Email questions to misskatecuttables@gmail.com
Hello everyone! Marcia here today. I have some holiday cards to share with you today. No, it’s not too late to make and send holiday cards! New Year is a holiday so for me, it’s ok to send a card after Christmas. I love to send holiday cards to friends and family as well as receive them. I especially love a box card that can sit on a tabletop or counter and doubles as home decor. ThisHexagon Pop-Up Christmas Tree Booth With Reindeer Card(SVG, Silhouette) and the Hexagon Pop-Up Santa's Workshop Card (SVG, Silhouette) cut files can be found in Lori’s Store along with many other varieties of holiday cards. I used the new Echo Park Paper Have A Holly Jolly Christmas collection.
Stop by the Lori Whitlock YouTube channel for tutorial instructions on how to assemble the hexagon pop-up cards. Don’t worry about how you will mail it, because these awesome cards fold flat for mailing.
I am sharing a tutorial on the blog today for the new Holiday Lighted Shadowbox Decor pieces. You can purchase a bundle Here that includes a Turkey, Santa, Reindeer, Elf, Snowman, and Nativity Scene. I made the Santa (SVG, Silhouette) and boy is he spectacular!
These are pretty easy to assemble. Let me show you how.
1. Cut out all the pieces from desired pattern paper or cardstock. Be sure to scroll in Silhouette Studio to see all the pieces. There are 4 inserts, side panels, and the decorated front and back. We are going to assemble the side and back first Adhere your pattern paper panels to the cardstock back and sides.
2. Glue one side panel in place, adhering it to the tab with the four slits and then each tab working your way around to the other tab with four slits on the opposite side
.
3. Let's assemble the front panel. We are going to start with Santa's face. The white paper goes behind the black. That goes behind the flesh colored face. Last, attach his eyebrows over each eye.
4. Adhere the black belt pieces on each side and the bottom of the beard. This allows you to fit the face piece in just so tucked under the mustache. Once the face is in there, go ahead and adhere the hat brim down along with the white pompom. Lastly, add the mustache.
5. We are ready to assemble the inside of the shadowbox. Take the back panel with the moon and start and slide the tabs through the slit in the back on each side. You want the hole in the back piece to be on the bottom.
6. Repeat with the other inserts.
7. Once the inserts are in place we can adhere the final side in place the same as the other side.
8. Adhere the front Santa panel to the front of the shadowbox. I did this a few tabs at a time. Then your Santa is ready for some lights or if you prefer you can leave it as is.
Thanks so much for stopping by. Be sure to check out all of Lori's latest designs in her shop. ~Marcia
I was in love with the Halloween luminaries so when Lori came out with these lighted shadowbox Christmas decor pieces I knew I had to make one, or maybe more! You can purchase a bundle of all the Holiday shadowbox cut files Here. The bundle includes a Santa, Elf, Snowman, Reindeer, Turkey, and Nativity Scene. I created the Snowman Lighted Shadowbox Decor (SVG, Silhouette) for the blog hop today.
Isn't he so festive! He is going to light up my Christmas buffet table this year. I purchased the smallest battery operated LED light string I could find at Micheals. The battery pack sits behind the snowman and the lights fit through a hole in the back. I was looking for white or silver cord because I was afraid a green cord would show through the paper. I did find a smaller watch battery powered light string from Tim Holtz Ideology at my local JoAnns but they only had multicolored light strings left. The Tim Holtz battery pack is less obtrusive and could be taped to the back.
Go check out all of Lori's latest Christmas designs. Right now Lori's designs are 30% off!!!!! Use code Dec2023 to get 30% off all SVGs, Fonts and Commercial Licenses!
There is a FREE cut file available today only, No purchase necessary.
Finally, Want to win a gift card to Lori’s Shop? Enter here…
I have yet to make a Christmas card this year so I thought I should get my act together. I made a trio of cards from the Pop Dot Christmas Card Bundle (SVG). You can also purchase the cards separately here; Santa Pop Dot Christmas Cars (SVG, Silhouette), Reindeer Pop Dot Christmas Card (SVG, Silhouette), and The Snowman Pop Dot Card (SVG, Silhouette). I used the new Lori Whitlock Have A Holly Jolly Christmas and the Magic of Winter collections. All of these cards fit into an A2 size envelope.
Aren't they all adorable! Go check out all of Lori's latest Christmas designs if you need to make some cards like me. Right now Lori's designs are 30% off!!!!! Use code Nov2023 to get 30% off all SVGs, Fonts and Commercial Licenses!
Want to win a gift card to Lori’s Shop? Enter here…
The Minnesota State Fair ended on Labor Day after a 2 week run. It was nice to attend again after missing it for the past few years thanks to COVID. A surprise favorite food for us this year was Dill Pickle Lemonade. OMG, so so good! Anyway, it inspired me to make a Box Card Lemonade Stand (SVG, Silhouette). I used the Lori Whitlock Bee Happy collection.
Go check out all of Lori's latest designs. Right now Lori's designs are 30% off!!!!! Use code Sep2023 to get 30% off all SVGs, Fonts and Commercial Licenses!
Don't forget to add the FREE cut file to your cart while you are at it. No purchase necessary.