Showing posts with label Lori Whitlock. Show all posts

Monday, December 25, 2023

Holiday Cards - Lori Whitlock

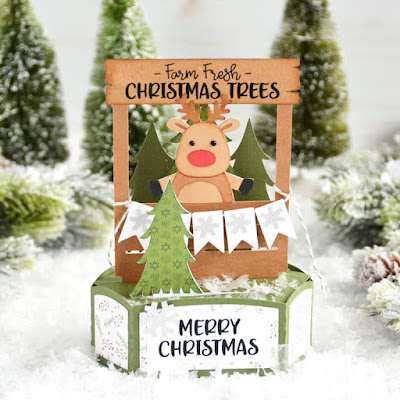
 Hello everyone! Marcia here today. I have some holiday cards to share with you today. No, it’s not too late to make and send holiday cards! New Year is a holiday so for me, it’s ok to send a card after Christmas. I love to send holiday cards to friends and family as well as receive them. I especially love a box card that can sit on a tabletop or counter and doubles as home decor. This Hexagon Pop-Up Christmas Tree Booth With Reindeer Card (SVGSilhouette)  and the Hexagon Pop-Up Santa's Workshop Card (SVGSilhouettecut files can be found in Lori’s Store along with many other varieties of holiday cards. I used the new Echo Park Paper Have A Holly Jolly Christmas collection.


Stop by the Lori Whitlock YouTube channel for  tutorial instructions on how to assemble the hexagon pop-up cards. Don’t worry about how you will mail it, because these awesome cards fold flat for mailing.
 
Thanks so much for stopping by,
~Marcia

Thursday, December 14, 2023

Santa Lighted Shadowbox Decor - Lori Whitlock Tutorial

 Hello friends. 

I am sharing a tutorial on the blog today for the new Holiday Lighted Shadowbox Decor pieces. You can purchase a bundle Here that includes a Turkey, Santa, Reindeer, Elf, Snowman, and Nativity Scene. I made the Santa (SVG, Silhouette) and boy is he spectacular!


These are pretty easy to assemble. Let me show you how.

1. Cut out all the pieces from desired pattern paper or cardstock. Be sure to scroll in Silhouette Studio to see all the pieces. There are 4 inserts, side panels, and the decorated front and back. We are going to assemble the side and back first Adhere your pattern paper panels to the cardstock back and sides.


2. Glue one side panel in place, adhering it to the tab with the four slits and then each tab working your way around to the other tab with four slits on the opposite side
.

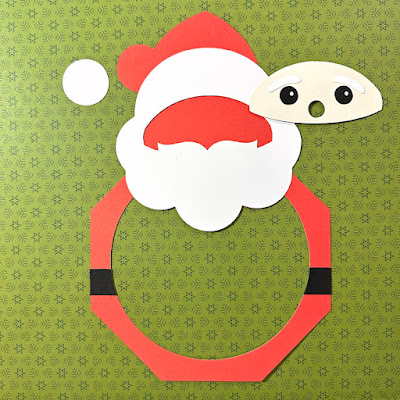
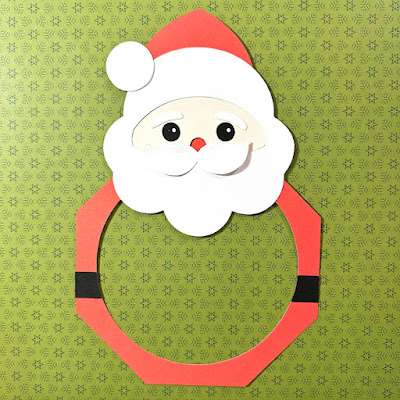
3. Let's assemble the front panel. We are going to start with Santa's face. The white paper goes behind the black. That goes behind the flesh colored face. Last, attach his eyebrows over each eye.


4. Adhere the black belt pieces on each side and the bottom of the beard. This allows you to fit the face piece in just so tucked under the mustache. Once the face is in there, go ahead and adhere the hat brim down along with the white pompom. Lastly, add the mustache.


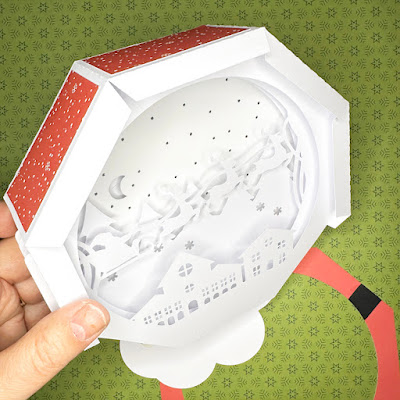
5. We are ready to assemble the inside of the shadowbox. Take the back panel with the moon and start and slide the tabs through the slit in the back on each side. You want the hole in the back piece to be on the bottom.

6. Repeat with the other inserts.


7. Once the inserts are in place we can adhere the final side in place the same as the other side.


8. Adhere the front Santa panel to the front of the shadowbox. I did this a few tabs at a time. Then your Santa is ready for some lights or if you prefer you can leave it as is.


Thanks so much for stopping by. Be sure to check out all of Lori's latest designs in her shop.
~Marcia

Monday, December 11, 2023

Snowman Lighted Shadowbox Decor - Lori Whitlock Blog Hop

 Hello everyone! It's blog hop time at Lori Whitlock.


Here is the blog hop order in case you want to start at the top or get lost along the way...

I was in love with the Halloween luminaries so when Lori came out with these lighted shadowbox Christmas decor pieces I knew I had to make one, or maybe more! You can purchase a bundle of all the Holiday shadowbox cut files Here. The bundle includes a Santa, Elf, Snowman, Reindeer, Turkey, and Nativity Scene. I created the Snowman Lighted Shadowbox Decor (SVGSilhouette) for the blog hop today.


Isn't he so festive! He is going to light up my Christmas buffet table this year. I purchased the smallest battery operated LED light string I could find at Micheals. The battery pack sits behind the snowman and the lights fit through a hole in the back. I was looking for white or silver cord because I was afraid a green cord would show through the paper. I did find a smaller watch battery powered light string from Tim Holtz Ideology at my local JoAnns but they only had multicolored light strings left. The Tim Holtz battery pack is less obtrusive and could be taped to the back.

Go check out all of Lori's latest Christmas designs. Right now Lori's designs are 30% off!!!!!  Use code Dec2023 to get 30% off all SVGs, Fonts and Commercial Licenses!


There is a FREE cut file available today only, No purchase necessary.


Finally, Want to win a gift card to Lori’s Shop? Enter here… 


Thanks so much for stopping by,
~Marcia

Thursday, November 23, 2023

Santa Gift Card Tag Tutorial - Lori Whitlock

 Hello friends.  Christmas is creeping up. I am a big fan of giving gift cards so my recipients can pick out their own gift but I like to make gift card holders to put them in. I selected the Gift Card Tag Santa (SVGSilhouette) to make for my gift cards this year.  There is a pocket on the back side of this tag that holds the gift card. I used Lori's Have a Holly Jolly Christmas collection to create my tags.


These are really easy to assemble. Let me show you how.

1. Cut out the pieces from desired pattern paper or cardstock.


2. Fold the tag along the score lines folding the flaps up. Apply glue to the flaps and adhere to the back of the tag to form the pocket.
 

3. Adhere the white beard and Santa suit trim to the top of the tag.


4. Slip the black belt through the belt buckle and adhere to the bottom of the tag. Add the two black buttons above the belt on the white trim.
 

5. Add ribbon or other embellishments as you wish.


Check out Lori's other gift card holder designs in the store and make some of your own. Thanks so much for stopping by.
~Marcia

Monday, November 13, 2023

Christmas Card Trio - Lori Whitlock Blog Hop

 Hello everyone! It's blog hop time at Lori Whitlock.


Here is the blog hop order in case you want to start at the top or get lost along the way...

I have yet to make a Christmas card this year so I thought I should get my act together. I made a trio of cards from the Pop Dot Christmas Card Bundle (SVG). You can also purchase the cards separately here; Santa Pop Dot Christmas Cars (SVG, Silhouette), Reindeer Pop Dot Christmas Card (SVG, Silhouette), and The Snowman Pop Dot Card (SVG, Silhouette). I used the new Lori Whitlock Have A Holly Jolly Christmas and the Magic of Winter collections. All of these cards fit into an A2 size envelope.


Aren't they all adorable! Go check out all of Lori's latest Christmas designs if you need to make some cards like me. Right now Lori's designs are 30% off!!!!!  Use code Nov2023 to get 30% off all SVGs, Fonts and Commercial Licenses!


Want to win a gift card to Lori’s Shop? Enter here… 


Thank you so much for stopping by,

~Marcia


Monday, November 6, 2023

Thanksgiving Tag Bags - Lori Whitlock

Hello everyone!

Can you believe it's November already and in no time it is going to be Thanksgiving! I wanted to make some treat bags for the little ones attending our Thanksgiving dinner. Lori Whitlock’s 2 on 12x12 Tag Bag Pilgrim (SVGSilhouette) and the 2 on 12x12 Tag Bag Indian  (SVGSilhouettewere just what I was looking for. I used the Echo Park Paper I Love Fall collection to create my tags along with a heavy cardstock for the bag.


Washi tape from the I Love Fall collection lines the bottom of the tags. After piecing my pilgrim and Native American girl together, I used some foam tape to adhere them to the tags. I attached the tags to the bags with some raffia paper ribbon.


Lori has lots of other fun Thanksgiving bags and treat boxes in her shop. Go check them all out
.
Thanks so much for stopping by today.
~Marcia

Friday, October 13, 2023

3D Pumpkin Tutorial - Lori Whitlock

 Hello everyone, Marcia here.  Halloween is creeping up and Lori just came out with these spooktacular 3D Pumkins that with a tealight inside make for amazing luminaries. I was obsessed with the lantern luminaries last year and made a bunch to light up my sidewalk for Trick or Treaters. I couldn't wait to add to my collection with the 3D Pumpkin Black Cat (SVGSilhouette). As a crazy cat lady with two black cats, the cat choice was a given. If you are not a fan of cats, check out her other designs in the store.


This looks complicated but I promise you it is easy to make. Let me show you how.

1. Choose your papers and cut out all the pieces. I chose to make an all black pumpkin, but these look great in white or orange as well.


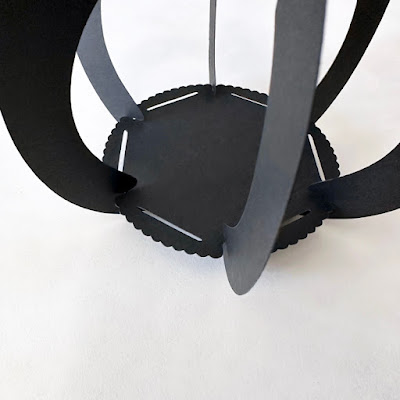
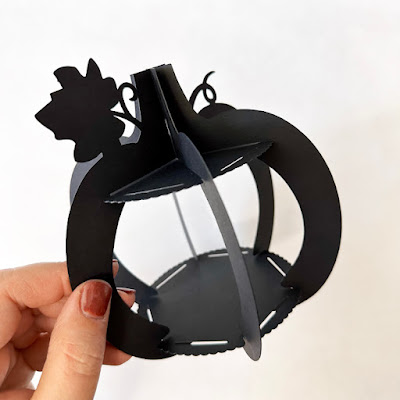
2.  The three pumpkin shaped pieces have notches cut in the stem and at the bottom. Carefully slip one pumpkin inside the other and attach two of the pumpkin pieces together at the stem using the notches and then at the bottom doing the same. Now add the third piece in the same manner. The pumpkins should be able to lie flat after connecting.


3. Spread the pumpkin out. Using one of the round disks, place it inside the pumpkin at the base matching up the notches.


4.  Take the second disk and place it inside the pumpkin at the top, again matching up the notches.


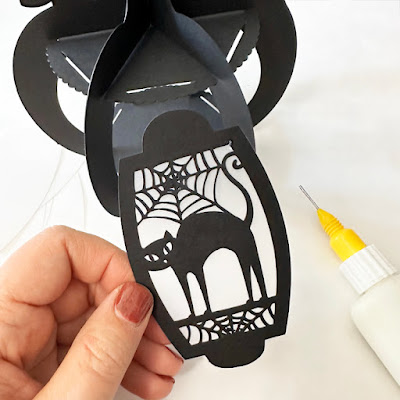
5.  Adhere the vellum pieces to the back of each panel. Go light on the glue to prevent it seeping out where it can be seen.


6.  Curl the panels a bit before inserting the bottom portion of the panel through the slot in the disk at the base of the pumpkin. Then place the top of the panel through the slot at the top.


7.  Repeat for each panel. Add an optional tealight before placing the last panel. I chose to add some raffia grass to the top of my pumpkin.


Be sure to check out all the new 3D Pumpkin designs. They are all spooktacular!

Thanks so much for stopping by! Have a great week,
~Marcia

Tuesday, October 3, 2023

Happy Fall - Lori Whitlock

 Hello everyone. 

Fall is officially here and I will soon be venturing to our local pumpkin patch with the family for some fun activities. For Fall wishes, The Lori Whitlock's Pumpkin Truck Back Box Card (SVGSilhouette) is so festive. It reminds me of those trips to the pumpkin patch.


I created my truck from cardstock and added some solid pattern papers from the Echo Park Paper I Love Fall collection. I couldn't resist adding the little racoon to my truck bed. He was cut from a die cut ephemera piece also from the I Love Fall collection. 

I know this card will put a smile on someone's face! Best of all it folds flat for mailing. Lori has lots of other fun Fall cards in her shop. Go take a look.

Thanks so much for stopping by today.
~Marcia