Showing posts with label Table Decor. Show all posts

Tuesday, September 7, 2021

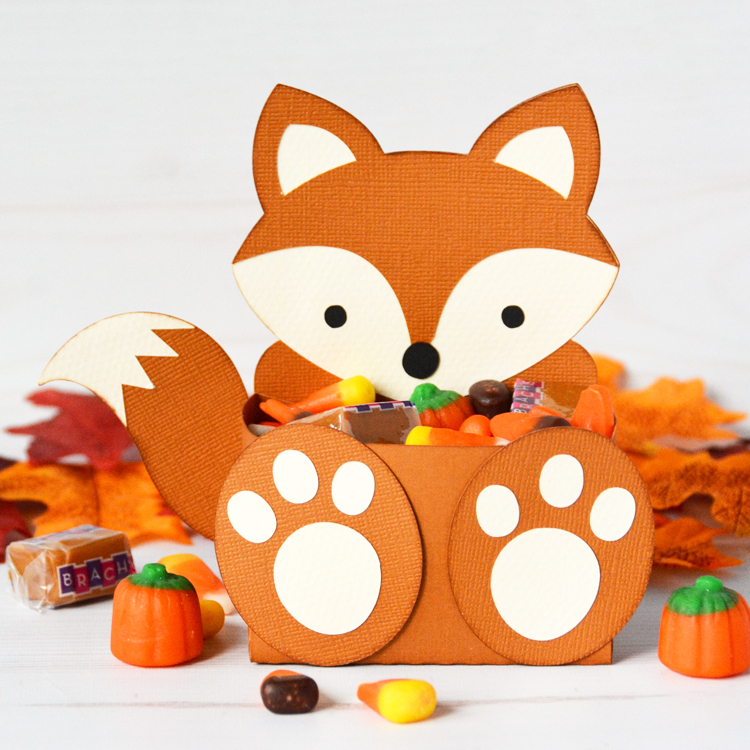
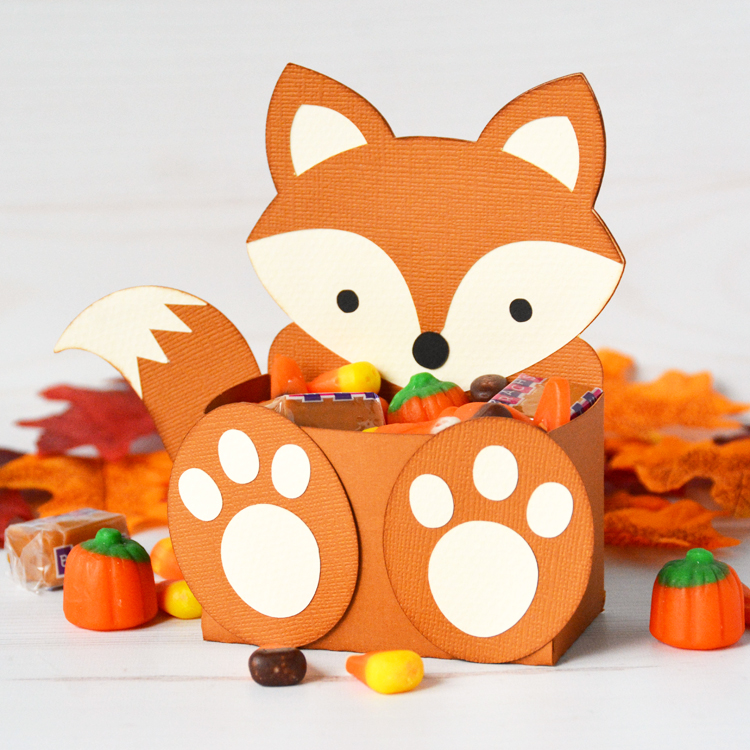
Fox Belly Box - Lori Whitlock

Hello blogging friends! 

Now that September is here I am starting to think of Fall papercrafts to make. This little Fox Belly Box (SVGSilhouette) from Lori Whitlock would make an awesome party favor, gift, or adorable table decor.  Fill it's belly with your favorite fall candy.

If foxes aren't your thing, there are lots of other animal belly boxes just as adorable. Check them all out in Lori's store. 

Thanks so much for stopping by.
~Marcia

Monday, October 26, 2015

Halloween Party Decor - Imaginisce

Hello blogging friends,

I love decorating my house for Halloween... and if you're going to all that trouble you might as well throw a Halloween party, right! Truth is, I just like having a few friends over. 

This year I wanted to try printing on burlap to create a unique home decor piece. I found this digital file by Kolette Hall in the Silhouette Store. This was actually much easier than I thought it was going to be. You can be sure that I will be creating one for Thanksgiving and Christmas now too. I decided to decorate my frame with rosettes. These are quick and easy to make with the Imaginisce i-Bond cordless glue gun. I wasn't sure how many rosettes I wanted, or what size either. So I made several different sizes from black and white pattern papers I found in the Happy Traveler collection. I decorated my rosettes with die cut numbers "31" and puffy stickers. Don't worry, those extra rosettes will be used to adorn some cupcakes.
 

I love my cordless i-Bond Glue Gun. It's low temp, so I don't have to worry so much about burning myself. It dries really fast... which is good when making rosettes, you don't have to hold them in place very long.


Here are a few detail pictures...


These yummy cupcakes are from my local Nadia cupcakes.... she is a cupcake wars winner! 


Supplies:
Imaginisce : Pattern Papers (Happy Traveler, Good Dog), Puffy Stickers, Enamel Dots (Give Thanks), i-Bond Glue Gun

 
 Thanks for stopping by,

Thursday, September 3, 2015

Take Flight | Cocoa Vanilla Studios - Xyron - Chibitronics Giveaway!

Hello blogging friends! 

Marcia here today with a fun Cocoa Vanilla Studios  Flying High project to celebrate the end of summer in the Northern hemisphere, just in time for my fellow Minnesotans who are attending the Minnesota State Fair! I used the Summer Carnival SVGcuts digital cut file to cut this Ferris wheel out with my Silhouette Cameo. Let me show you how fun this really is...

  CocoaVanillaStudios_FerrisWheel 

I decorated my Ferris wheel with a ton of the stickers from the Flying High collection. Each basket seat has star stickers on both ends. You can see the sticker planes here too.

  Detail1

Detail2

Detail5

One side of the Ferris wheel is decorated with rhinestone brads and the other side has these awesome lights by Chibitronics. (I am giving away a set of these lights to one of my blog followers! Just leave me a comment telling me what project you would use them on.) I was a little concerned about getting the lights to work so I only put them on one side. The lights are leds mounted on a sticker pad. You create circuits with copper tape to connect the lights and a battery together. Please view their website for more information.
  Detail4

Detail3 

Here is a little tutorial on the lights....

Step 1. Figure out where your lights are going to be and punch holes.


Step 2.  Place your lights into the holes. The sticky side of the light pad will be facing up.


Step 3;  Carefully place the top side of the wheel over the bottom side, lining up edges.


 Step 4. Now the lights are stuck to the back side of the Ferris wheel.


Step 5.  Now you are ready to wire the lights with the copper tape.


The other end of the tape gets connected to a small battery. I created 4 parallel circuits on my Ferris wheel, so I used 4 batteries. Once you have the wheel wired, glue the top piece back on.

Of course I used my new Xyron Creative Station to adhere the pieces together! I love the smooth  edge to edge coverage you get. 


I am giving away a set of these lights to one of my blog followers! Just leave me a comment telling me what project you would use them on.  Winner will be announced here on September 14th. Have a great week!

 ~Marcia

Monday, July 20, 2015

You're the Coolest and Let's Chill - Xyron and My Favorite Things

Hello blogging friends. Xyron and My Favorite Things are having a blog share all week long.


Today, I am sharing what I created. I got to work with the new My Favorite Things Penguins in Paradise stamps and coordinating dies.


I LOVE these little penguins!! Aren't they adorable. I went tropical for my first project and created a Pineapple Gift Box using my new Xyron 9" Creative Station, the Fruity Fiesta cut file from SVGcuts and papers from the Imaginisce Endless Summer and Childhood Memories collections.


Here's how I did it...

Step 1. Cut out the pineapple parts using your electronic die cutter (Silhouette Cameo or other). Ink the edges of your cuts (optional).


Step 2. Run the pineapple outer pieces through the new Xyron 9" Creative Station.


Step 3. Adhere the outer pineapple die cut pieces to the cardstock die cuts, peeling back the rounded cuts so that they stick out a little. Pineapples are dimensional after all. Assemble the pineapple.


Step 4. Switch out the 9" adhesive in the Xyron Creative Station and put in the 5" permanent adhesive. Run the tag parts through after stamping "You're the COOLEST" onto the tag.


Switching out the adhesive is so easy to do. Open the lid.. Pull out the 9" roll. Flip up the green 5" guide and insert the 5" roll. Close the lid. 


Step 5. Die cut, stamp, and color your penguin. I used Copic markers to color mine.


Step 6. Assemble the tag, I decided to use some foam tape here to give it some dimension.


But I was having too much fun coloring these cute penguins, I wanted to make a card too...


I used the same SVGcuts Fruity Fiesta cut file for my card and matching envelope. I thought it was perfect for the penguin holding the popsicle.

Here is how I created my card.

Step 1. Die cut the card pieces using an electronic die cutting machine (Silhouette Cameo or other) and run the card parts through the new Xyron 9" Creative Station with the 5" permanent adhesive loaded.


Step 2.  Die cut, stamp, and color your penguin and a palm tree, I used Copics to color mine, Stamp "Let's Chill" onto white cardstock and die cut using the My Favorite Things Fishtail Flags STAX Die-namics die.


Step 3. Assemble your card using the Xyron Mega Runner and some foam adhesive.


Step 4.  Assemble the envelope using  Xyron Double-sided Tape. You only need a few strips.


and there you have it...


 Thanks for stopping by today. Now hop over to the My Favorite Things blog to see what their design ers created with Xyron products. Be sure to check back all week long to see what the other designers have created too. Xyron designer projects can all be viewed from their Facebook page here.

~Marcia

Monday, April 6, 2015

Welcome Spring Easter Treat Boxes - Imaginisce

Hello blogging friends. I love decorating for Holidays. Spring comes slow to Minnesota and it's nice to freshen up the house with bright and cheery Easter decorations. The Imaginisce Welcome Spring collection is one of my favorites and I used it to create these festive Easter treat box eggs. These eggs open up and can be filled with some Easter grass, candies and small toys. They also make a great centerpiece on my dining room table. 


I used my Imaginisce i-Rock to add assorted crystals to the top halves of the eggs. Crystal swirls can be created by using stencil placements. Hint....It's much easier to apply the crystals on a flat surface before assembling. Also, do not use on plastic tables. I once glued my project to the table, lol. I now have a sturdy wood desk.
 

I think this is my favorite paper in the collection.


I have 3 kids.... so of course I do everything in triplicate. 


Supplies:
Imaginisce : Pattern Papers (Welcome Spring), I-Rock, crystal mix gems, 
American Crafts: Cardstock
 SVGcuts file: Poplar Tulips
 
Hope you all have a fabulous Easter!

Tuesday, October 28, 2014

Turkey Day Table Decor with Imaginisce

Hello blogging friends. I have a fabulous project today to share with you that I created with my Imaginisce Bushel O' Fall papers. I love decorating for a party! These turkeys are going to look great on my Thanksgiving tables. The Imaginisce Bushel O' Fall pattern papers were a perfect choice. I love those yellow, orange, and reds mixed with a touch of teal blue. 


The inspiration for these came from a Minnesota scrapbook store in Pine City.  I saw some of these rosette turkeys while on a girl's outing last Spring and thought to myself... I need to make something similar to that! Here is the Pine City Scrapbook Store version ....


Here are some close-ups of my turkeys ....


These turkeys were easy to make. I created 3 rosettes using 1", 1.25", and 1.5" strips of pattern papers. I used my i-Top punches to cover the middle of the rosette, so it still looks like turkey feathers. Use a small in the front and a large one in the back to cover the hole in the middle. You want them to look nice from a back view too. 


WARNING .... Making these is addictive..... 


Supplies:
Imaginisce : Pattern Papers (Bushel O'Fall), i-Top, small, large punches, i-Bond Hot Glue Gun
Core'dinations cardstock
Silhouette Cameo (ticket cut file) and I used the Print and Cut feature for the text on the tickets
Tim Holtz Idea-ology Memo Pins
ScorePal Scoreboard

Oh, and those cute little wood veneer leaves are on sale in the Clique Store, just use coupon code Marcia10 to get 10% off :) 
and if you happen to be driving by Pine City, Minnesota .... This scrapbook store is well worth a visit!

Thanks for stopping by...