Showing posts with label Valentine. Show all posts

Friday, February 11, 2022

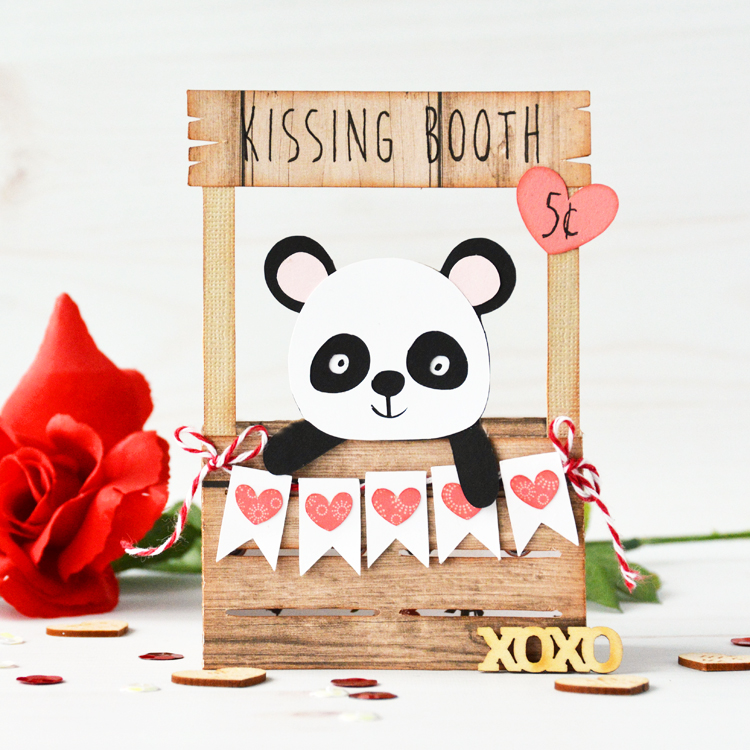
Panda Kissing Booth Valentine Box Card Tutorial - Lori Whitlock

 Hello everyone! 

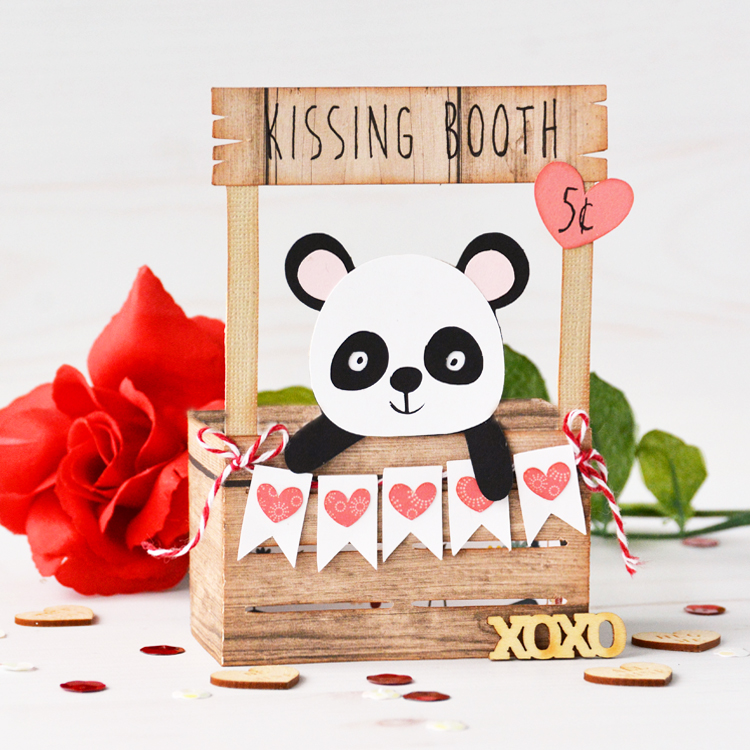
I’ve been busy making Valentine cards to send out to my nieces and nephews. This adorable panda bear in a kissing booth from Lori Whitlock caught my eye (SVGSilhouette).

I love gifting box cards that can be left out on a counter or desk and give a person a reason to smile! Let me show you how I created this card.

  1. Select your pattern papers or cardstock and cut out all pieces.
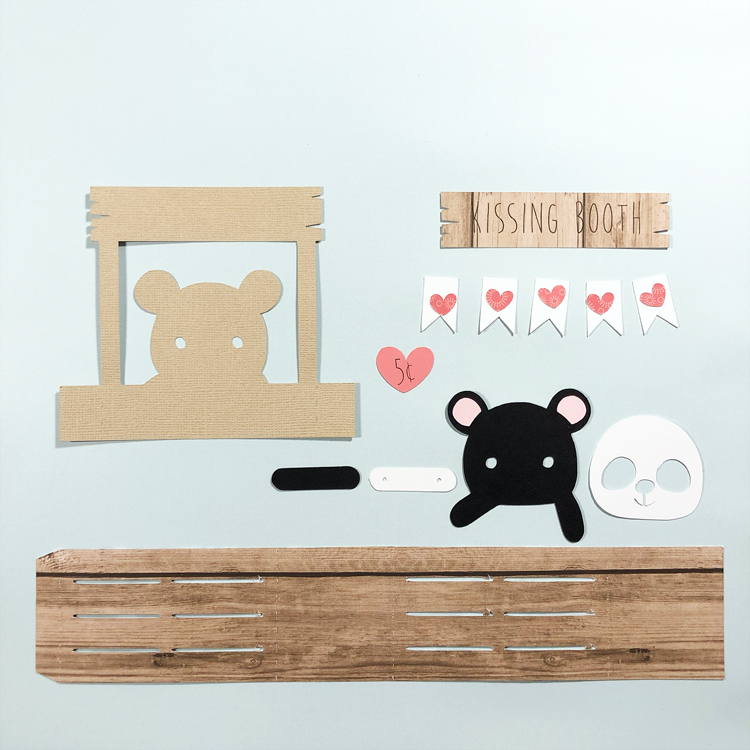
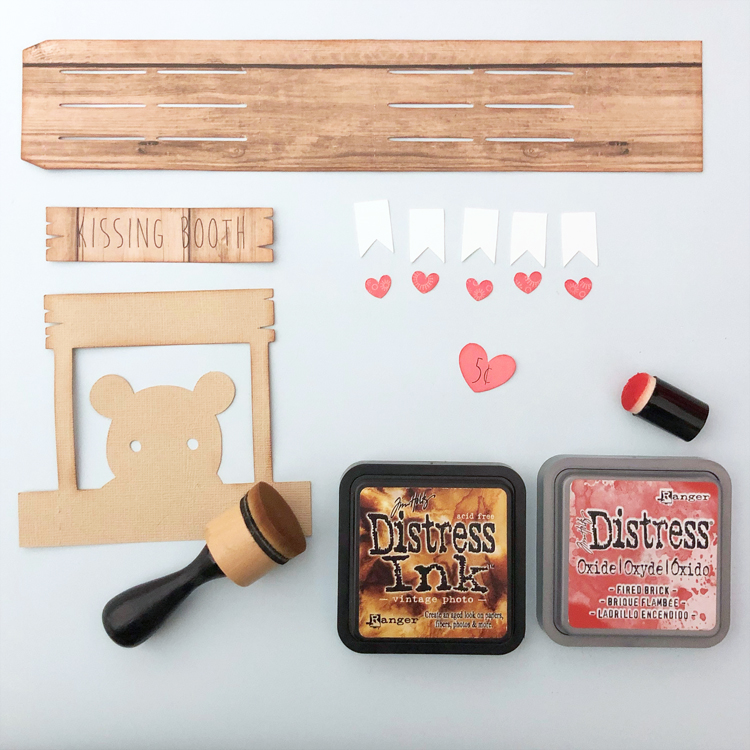
2. Ink the edges of the papers to add dimension and shading.
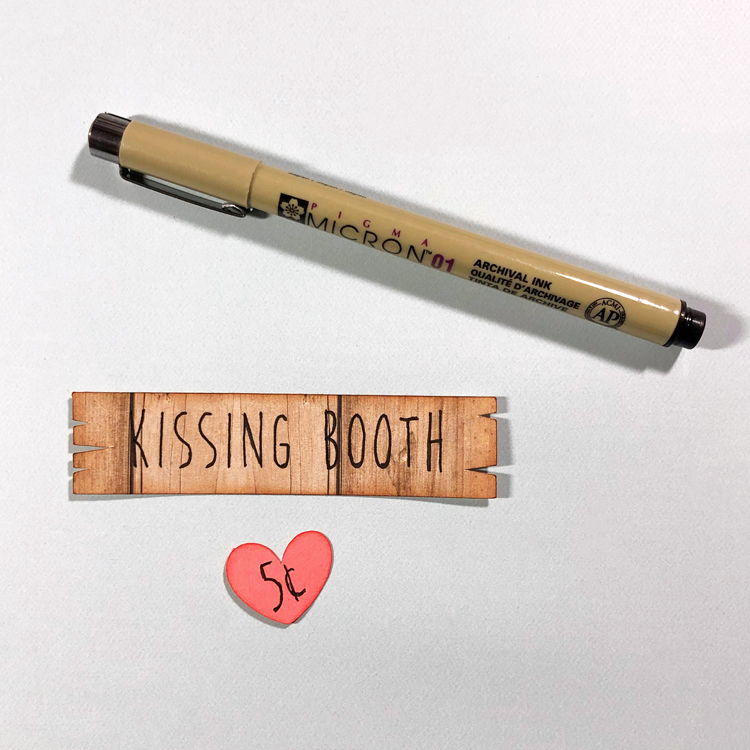
3. I used the print and cut feature of my Silhouette Cameo to print "Kissing Booth" and "5¢" before cutting, but I felt that the words didn't pop enough against the dark papers. I used a black marker to carefully go over the letters. You could also use a marker to add the text when not using print and cut.
4. Assemble the kissing booth card base and box card insert. I added some bakers twine to my banner across the kissing booth. Adhere the insert into the card base so that the panda's arms are in front of the banner on the front of the card.
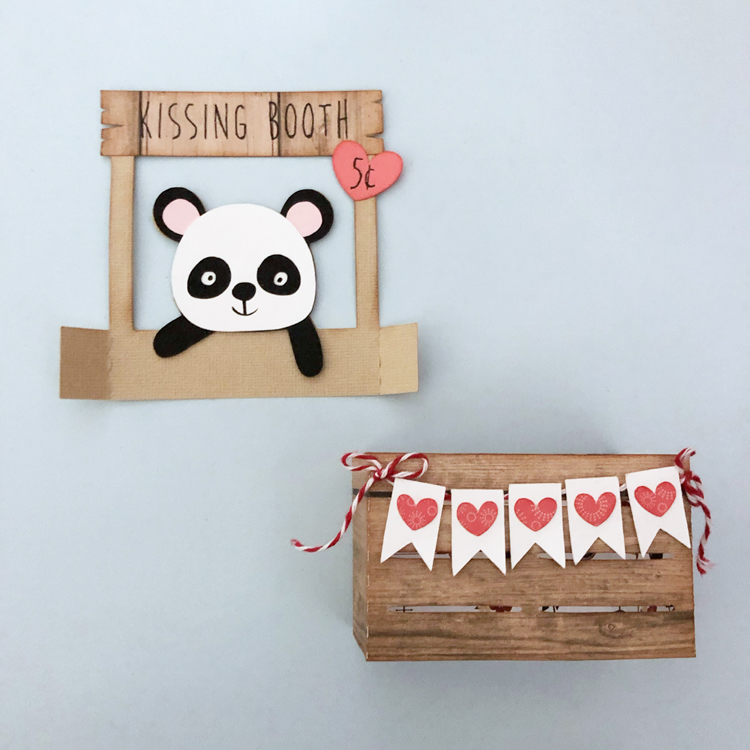
This card folds completely flat for mailing measuring 5.25" x 5.25". Lori has lots of Valentine card ideas in her shop. Go check them all out and have some fun making your own Valentine cards!
Thanks so much for stopping by.
~Marcia

Monday, February 7, 2022

Lori Whitlock February Blog Hop

 Hello friends! It's blog hop time at Lori Whitlock!

Here is the blog hop order in case you want to start at the top or get lost along the way...

I wanted to make some punny valentines to send off to my nieces and nephews. This Pop-Up Fish Card (SVGSilhouette) was perfect. Not mushy love notes but letting them know how awesome they are!


The inside of the card has a fish that pops up when the card is opened.


Go check out all of Lori's new designs and while you are at it, grab this FREE cut file! No code or minimum purchase required.


Did I mention all those designs are 30% off!!!!!  Use code Feb2022 to get 30% off all SVGs, Fonts and Commercial Licenses!


And finally, how would you like to win a $20 Coupon to the Lori Whitlock SVG Shop?


Thanks so much for stopping by. Your next stop is Brigit Mann.
~Marcia

Monday, October 11, 2021

True Love - Lori Whitlock Blog Hop

Hello everyone! It's blog hop time at Lori Whitlock!


Here is the blog hop order in case you want to start at the top or get lost along the way...

My niece recently got married and I wanted to make her a special card. I decided on the Hexagon Pop Up Card Valentine Couple, making a few changes to it so that I could use it for a wedding (SVG,Silhouette). Really the only change needed was to omit the Valentine sentiment on the front of the card base. I used the pretty Lori Whitlock Our Wedding collection.


Go check out all of Lori's new designs and while you are at it, grab this FREE cut file! No code or minimum purchase required.


Did I mention all those designs are 30% off!!!!!  Use code Oct2021 to get 30% off all SVGs, Fonts and Commercial Licenses!


And finally, how would you like to win a $20 Coupon to the Lori Whitlock SVG Shop?


Thanks so much for stopping by. Head over to Brigit Mann next.
~Marcia

Friday, January 29, 2021

Kiss Me - Lori Whitlock Box Card Tutorial

Hello everybody. 

Valentine's Day is only a few weeks away. Are you ready yet? Lori Whitlock has the cutest new Valentine cards in her shop, like this Valentine Heart Envelope Box Card (SVG, Silhouette). I created this with pattern papers from Lori's Our Wedding collection by Echo Park and added some older ephemera from my Pebbles stash.

Let me show you how you can create this card. In Silhouette Studio, I turned on registration marks, then printed and cut the "I Love You" sentiment. No need for a stamp and ink pad. The registration marks help the Silhouette Cameo cut where it should, in this case the banner with the printed I Love You perfectly centered. You set registration marks in the Page Setup Window. Click on the third icon and select Registration Marks ON. You will know they are on when you see the grid appear at the top with the black square and corner marks. Go back to the first Page Setup menu and adjust the width and height so they match the size of the cardstock you are using in your printer. Check the Show Print Border and Show Cut Border. You want the text you are printing to be inside of the print border. Then remove the banner so only the text remains and send to the printer (see printer icon at very top on the left). Once printed, place your cardstock on your cutting mat and load into your Silhouette Cameo. Move the banner back into place around the I Love You and select Send to cut. Go back to the Page Setup to remove the registration marks and print border and resize the width and height back to 12x12.

Select your cardstock and pattern papers and cut shapes without resizing. This design has a lot of hearts that can make assembling confusing. I like to lay out my pieces as I cut them so I know exactly where they will go. This is easiest if you cut the card base and panels first.

Next, I ink the edges of my pattern papers. This subtle shading gives your cut pieces depth. Select an ink shade that matches your pattern papers as close as possible. It's better to go with a little darker shade rather than a lighter shade.

Adhere your panels down on the card base and create your box by gluing the tab on side to the back panel. Adhere the hearts to the center insert. You can use foam dots to pop a few of them up for dimension. Then glue the tabs of the insert to the inside of your box card lining everything up along the sides of the card.

Add remaining hearts to the back panel so they can be viewed above the center insert. Embellish as desired. I added these adorable fox and the large Kiss Me ephemera pieces.

On the back of the card I added a white circle for writing on and another ephemera piece.

I love these 3D cards! They fold flat for mailing, but can be popped up and displayed on a table or countertop. Send one to someone you know who could use a little extra love right now. Thanks so much for stopping by.

~Marcia

Friday, February 7, 2020

Love You - My Creative Scrapbook

Hello blogging friends!

I have some exciting news to share! I am guest designing for My Creative Scrapbook for the month of February! They sent me the February Main kit which featured the Simple Stories So Happy Together collection, some PhotoPlay Paper We Are Family collection pattern papers, and some Pebbles This is Family collection pattern papers along with puffy phrase stickers.


I did a kit unboxing YouTube video. You can watch it here...


The kit includes 5 exclusive digital cut files too! It's a great bargain. I used the Love You cut file on my first layout...


Here are some close-up shots...


I even did a process video for this. 


I love how this turned out! I have three more layouts to share with you over the next month. Be sure to keep an eye out.

~Marcia

Tuesday, February 12, 2019

Sweetheart - JustNick Studio

Hello blogging friends!

I am back today to share my JustNick Studio LOVE inspiration with you. There are lots of awesome new cut files in the store and I could not wait to use them ... especially this Candy Heart Background. How cute is that! Perfect for scrapping your Valentine's Day pics. My mixed media background sets those hearts off nicely.


I love creating layers of papers and embellishments on my layouts. I actually used 5 cut files here! Here is a closer look at those fabulous hearts. Can you see the other cut files?


I placed one of the Dainty Doilies behind my photo. Isn't it gorgeous! Doilies are so great for layering! They add a nice feminine touch.


Underneath my photo is a border strip of hearts from the Hearts digital cut file. Then, sandwiched between flowers you can see the pretty airy leaves from Stems 5.


In the lower right hand corner I chose the scripty word 'Sweetheart' from the Love List digital cut file for my layout title. This cut file has lots of title options for your Love layouts. You could even mix and match these words with another cut file to create a totally new title option.


Here are the digital cut files I used today...


Thanks so much for stopping by today. I hope you all have an amazing Valentine's Day.

Monday, February 11, 2019

Hugs & Kisses Cake Tutorial - Jillibean Soup

Hello blogging friends!

As a kid my Mom would let me add designs or words onto the top of meatloaf with ketchup before putting it in the oven. This was usually just a smiley face or a Hello. Years later I am still playing with my food! Today I want to show you how you can use a Jillibean Soup digital cut file to decorate a cake (or brownies as I have done here) for Valentines Day ... or any day really when you want to tell someone you care! I have sent messages on the tops of cakes to friends battling cancer to make them laugh or just to offer encouragement. Heck, if you don't bake you could even do this with store bought brownies or cake!


Here's how you can make one too! Once you have decided on a design, you may need to alter it slightly to prevent the insides of letters from being discarded. Look at the O's in the XOXO. Marcia used the knife utility to cut away a portion of the O at the top and bottom so that the middle of the O would stay connected. She also did this for the larger loops in the S's and the K. A tip for using the knife utility ... Make your design bigger, then cut out the parts you don't want before sizing it as needed to fit on the top of your cake. Cut it out of any cardstock you have on hand in your stash. (I like to use colored cardstock, since I use mostly black and white on my layouts.)


After you have baked your cake and it has cooled down, place your stencil on top. Pour some powdered sugar into a sifter (or in a pinch use a strainer with small holes). Sprinkle powdered sugar evenly over the top. Then remove the stencil. A wet brush works really well at picking up stray pieces of sugar.


And here is the finished result ...


Supplies:
Jillibean Soup
Digital Cut Files: Hugs and Kisses / Design ID #276708
Other: Silhouette Cameo, cardstock, Brownie Mix, Powdered Sugar.

Are you ready to give it a try? I would love to see your cakes if you do!
Have an awesome rest of your week.
~Marcia

Thursday, January 31, 2019

Be Mine - Simple Stories

Hello blogging friends!


Today I am sharing a layout all about LOVE that I created with the Simple Stories Kissing Booth collection. This collection is so gorgeous!!!! When I saw those beautiful floral pattern papers I knew I was going to be doing a lot of fussy cutting! I wanted to display those florals in a rustic setting so I chose a woodgrain pattern paper from the SN@P! Basics paper pack for my background. Every layout about love needs a heart too, right? I found a gorgeous heart digital cut file in the Handipaper Etsy shop. Here is how my layout turned out ...

I backed the heart with the Crazy for You pattern paper. I really like how the black and red contrasted with my black and white photo. There are more gorgeous flowers in the Bits and Pieces die cut packs. They are great for layering. I added a little sticker bird here in this cluster. Isn't he adorable. Those fussy cut flowers are tucked behind my photo as well as peeking out from around that big heart cut file.


The Be Mine die cut was perfect to use for my title. You can see more of those fussy cut flowers peeking out underneath it. A few scattered chipboard hearts helps to add some dimension.


The pattern paper with the tickets is fun to cut into strips. I combined it with a border sticker to ground my journaling spot. This embellishment cluster has another bird from the puffy stickers pack. The puffy stickers are a great way to add dimension as well.

Put the Kissing Booth collection on your must have list. It is perfect for documenting all your love stories and more. Please check out my YouTube process video to watch my process...


Thanks so much for stopping by today! Enjoy the rest of your week.
Supplies
#10377 Simple Stories Kissing Booth Collection kit
#10378 Simple Stories Kissing Booth Combo Stickers
#10379 Simple Stories Kissing Booth Always Be True pattern paper
#10380 Simple Stories Kissing Booth Love Day pattern paper
#10383 Simple Stories Kissing Booth Hugs N Kisses pattern paper
#10386 Simple Stories Kissing Booth Crazy For You pattern paper
#10391 Simple Stories Kissing Booth 6x12 Chipboard Stickers
#10392 Simple Stories Kissing Booth Bits and Pieces
#10393 Simple Stories Kissing Booth 4x6 Stickers
#10394 Simple Stories Kissing Booth Puffy Stickers
#2849   Simple Stories SN@P! Basics Cedar / White Ledger paper
~Marcia

Wednesday, January 30, 2019

Coffee and Friends and more - Jillibean Soup Mix the Media

Hello blogging friends!

I wanted to share some Jillibean Soup Mix the Media projects that I created for Creativation 2019. This is a once a year show where the craft and hobby manufacturers shares their new products. These items were on display in the Jillibean Soup booth.

The first one is an acrylic stand that I added some brown vinyl to using a Jillibean Soup digital cut file that is available in the Silhouette store. These acrylic stands can be found at Joanne's and are perfect for adding your own designs to.


Supplies:
Jillibean Soup 3x4 Acrylic Wood Stand JB1651
Digital Cut Files: Coffee and Friends Make the Perfect Blend / Design ID # 242788
Other: Silhouette Cameo, brown matte vinyl, transfer tape.

Once I got started playing with vinyl and cut files it was hard to stop me! I found these galvinized pails at Micheals and thought they would be perfect for growing herbs. I could even start them inside if I can keep the cats out of them, lol. I have plans to do more of these. There are Jillibean Soup cut files for Rosemary, Lavender, and Dill. I am hoping they add my favorite... Cilantro.


Supplies:
Digital Cut Files: Fresh Herbs Thyme / Design ID # 260240, Fresh Herbs Basil / Design ID # 259115
Other: Silhouette Cameo, black glossy vinyl, transfer tape, small galvanized pails

I added some vinyl and felt flowers to a Jillibean Soup Mix the Media Rustic White Frame to create a garden sign to go along with my herb pots....


Supplies:
Jillibean Soup 6x10 Rustic White Frame JB1637
Felt Flowers Mixed Magenta JB1429
Digital Cut Files: Welcome To The Garden / Design ID # 261749
Other: Silhouette Cameo, green and black matte vinyl, transfer tape.

and one more ... thinking of Valentine's Day coming up, I added some red vinyl to this Jillibean Soup galvinized heart.


Supplies:
Jillibean Soup Galvinized Heart JB1194
Digital Cut Files: You Will Forever Be My Always / Design ID # 173383
Other: glossy red vinyl, transfer tape, Silhouette Cameo.

Thanks so much for stopping by. Have I convinced you yet to try your hand at adding some vinyl to something? 
~Marcia