Showing posts with label Watercolors. Show all posts

Monday, July 13, 2020

Summer Fun - My Creative Scrapbook

Hello blogging friends!

I am sharing another layout with the July Main kit from My Creative Scrapbook. This awesome kit features the Simple Stories Summer Farmhouse collection. I had so much fun with the kit!! I used the fabulous July sketch for this layout....


Here is my layout ... I did not stray far at all.


One of our favorite summer destinations is Itasca State Park in northern Minnesota. It's a beautiful park with boat and bicycle rentals. We almost always rent a boat for a day and try our luck fishing. We had no luck at all on this outing, but we enjoyed being outside on this gorgeous lake! I decided to use a cut file from an earlier month. The sun on here seemed a must for summer. I added the Simple Stories foam titles on top for my title.


Here is where I deviated just a little from the sketch. The top of my layout felt like it needed a clothesline for this cute swimsuits.


You can see lots of gorgeous layers here. I tucked my journal card underneath my photo.


I played some more with my Lindy's Stamp Gang Magicals to create my watercolor background. These powdered pigments are so fun to play around with.


You can see how it all came together here...


Supplies:
My Creative Scrapbook Kit Club

Simple Stories Summer Farmhouse collection ... http://shrsl.com/2d8wd
Fineline Glue Bottles ... https://amzn.to/3cGaVbx
BowEasy - https://amzn.to/3eYpZmh
Cutter bee Scissors - https://amzn.to/2YdgXei
Lindy’s Stamp Gang Magical Jar Set, Beauty School Dropout - https://amzn.to/31P5XY1
Bazzill Marshmallow—12x12 Cardstock | 100 lb Heavy White - https://amzn.to/2YqNFJD

Thanks so much for stopping by! Have a great week
~Marcia

Friday, June 12, 2020

Travel Berlin - My Creative Scrapbook

Hello blogging friends!

Today, I am sharing my second layout with the June Main kit from  My Creative Scrapbook. I loved this kit so much!! It features the Vicki Boutin Let's Wander collection including a star stencil. That inspired my to play with some of my Magicals powdered pigments from Lindy's Stamp Gang and try out some of Vicki's Creative FX iridescent glaze. My photos really do not do it justice. That iridescent glaze is so pretty.


This nightlife photo of the Friedrichstadt Palast just needed a starry night sky to set it off perfectly. The colorful rays on this pattern paper seem to be radiating from the photo as well. To balance the color, I placed the chipboard city-scape in the opposite corner, layered on top of some other fun travel die cut ephemera pieces.


I used some PinkFresh Studios alphas from the Everyday Musings collection to add Berlin over the buildings.


A camera and a vellum map went in the opposite corner.


This layout has a magical quality to it that makes me remember just how awesome the theatrical production was that we saw here. Vivid Grand, you did not disappoint! 


You have got to watch this YouTube process video, just to see how this fabulous background came together .... there is a reason those powdered pigments are called Magicals ...


Supplies:

My Creative Scrapbook Kit Club (These kits are amazing!) Vicki Boutin's Let's Wander collection Lindy’s Stamp Gang Magical Jar Set, Jingle Bells American Crafts Iridescent Vicki Boutin Mixed Media Creative FX Glaze American Crafts Vicki Boutin Stencil 3PKG, Starstruck, Let's Wander Heidi Swapp Minc Foil Application Machine Starter Kit Bazzill Marshmallow—12x12 Cardstock | 100 lb Heavy White Fineline Glue Bottles

Sunday, April 5, 2020

Love - Clique Kits

Hello blogging friends!

I am so excited to share a second layout as a guest designer for Clique Kits. They are known for featuring artists in their kits from all over the world. In the February Base kit called Wonderful World, a German artist Alexandra Renke is featured. It's also full of Vicki Boutin, Heidi Swapp, and some other unique pieces. For my second layout I wanted to do something completely different from my first layout Let's Go Explore and I wanted to use some of Alendra Renkin's beautiful papers. You guys, these papers are so pretty, I could not bring myself to cut them. I decided to use one of the papers as a background for this layout.


I created a sketch as well. Clique Kits is giving away store credit if you create a project based on my sketch. You can share your project in the Clique Facebook group.


I used a cut file in the Clique store and cut it from an ombre pink pattern paper from the Heidi Swapp Storyline collection. I placed it on the far right side of my layout, extending it over the edge. Then I added some fussy cut flowers a die cut ephemera butterfly and a title. The title was not from the kit, but from my stash. It's from PinkFresh Studios Joyful Day collection.


On the left side of my layout I placed this adorable photo of my neice and her boyfriend. I tucked in more fussy cut flowers along with die cut ephemera pieces and a gorgeous wood veneer butterfly that you can find in the kit.


Take a look at this cluster up close... Gorgeous!


Want to see my scrapbook process....


Check out the other kits available in the Clique Kits store. You do not need to be a subscriber to purchase them from the store. You will love how unique they are!

~Marcia

Friday, March 13, 2020

Esme - My Creative Scrapbook

Hello blogging friends!

I made a bunch of layouts with the March My Creative Scrapbook Main kit and can't wait to share with you. This kit featured the Pink Paislee Bloom Street collection and exclusive cut files from Neat and Crafty Cutz. It's a beautiful kit! Here is the first layout I made....


This is my niece Esme, the latest addition to our family! She is the cutest with her big brown eyes! I used one of the exclusive cut files to create a cluster of flowers under my photo. I added more flower ephemera pieces on top.


I added a sticker to the right of my photo that says Showered With Love. That pretty much sums it up, spoilt by everybody.


I love that gorgeous butterfly too. Do you notice my watercolor background? I thought I would try some Lindy's Magicals. So fun to try.


Want to see how it all came together? Check out my YouTube process video here...


Thanks so much for stopping by! Have a great weekend. If your sick, stay home and scrap!
~Marcia

Tuesday, February 18, 2020

Adventure More - Pebbles

Hello blogging friends!

This week on the Pebbles blog it's all about the guys! I picked out some masculine pattern papers from the newest Jen Hadfield collection Hey Hello; blues, greens, blacks, and a bit of yellow. I knew embellishing would be difficult so I decided I needed a strong design. My go to shapes for guys are stars and triangles. It's been a while since I did a triangle layout so I decided to give it a go... lifting a Pinkfresh Studios layout I did a few years ago. Here is what I came up with ...


I even cropped my photo into a triangle! If you look closely, you can see I added a few machine stitched triangles too.


The watercolor background sets off my photo and the pattern papers beautifully. I tried something different for my background. I wanted to try Lindy's Magicals powdered pigment. These were so fun and easy to use. I have lots more experimenting to do, but so far I am loving the results. Check out the YouTube video below for details. I pulled out the Sun & Fun collection embellishments because I wanted to stick to an outdoor theme. I found these awesome trees and a frog which was just perfect!


I used the Lake Thickers that coordinate with the Sun & Fun collection for my title 'Adventure More'. Not wanting to do much more embellishing, I thought I would just stamp a few butterflies from the Sun & Fun collection onto my background. Note to self... stamping before adding the title would have made things easier.


I added a strip of pattern paper at the bottom of my layout, repeating the triangle pattern in this pattern paper. At the top of the layout, I added a few triangles I had leftover and then a few tags from the Chasing Adventure collection.


I love how this turned out! Watch my YouTube process video to see how it came together. (and things to do differently, lol) 


Why don't you join us and create a masculine layout too.


Supplies:
Pebbles – Hey, Hello Collection – 12 x 12 Double Sided Paper – Loves Me
Pebbles – Hey, Hello Collection – 12 x 12 Double Sided Paper – Pink Posies
Pebbles – Hey, Hello Collection – 12 x 12 Double Sided Paper – Twilight
Pebbles – Hey, Hello Collection – 12 x 12 Double Sided Paper – Blushing Hedgehogs 
Pebbles – Hey, Hello Collection – 12 x 12 Double Sided Paper – Thinking of You Sentiments
Pebbles – Hey, Hello Collection – 12 x 12 Double Sided Paper – Bee Blossoms 
Pebbles – Hey, Hello Collection – 12 x 12 Double Sided Paper – Flower Blossoms
Pebbles – Sun & Fun collection – Clear Acrylic Stamps
Pebbles – Sun & Fun collection – Die Cut Ephemera pack with Foil Accents
Pebbles – Sun & Fun collection – Lake Thickers - Foam Iridescent Foil Alphas

Pebbles – Chasing Adventures collection – Die Cut Ephemera pack with Foil Accents - Phrases


Thanks so much for stopping by. Have a great week!
~Marcia

Monday, August 27, 2018

Fun In The Sun - JustNick Studios

Hello blogging friends!

Have you seen the new JustNick Studios Fun In The Sun title in the on-line store? I wanted to combine it with the South Pacific Floral digital cut file, but not in the usual way. I busted out my Silhouette sketch pens and instead of cutting out the design, I sketched it instead. Then I dug out my watercolors and got busy adding some color to the sketched design. This gave me a gorgeous unique background that I could use to scrap some Waikiki Beach photos and perfect for the Heidi Swapp Pineapple Crush collection. Take a look at how my layout turned out...


I am by no means good when it comes to watercolors, but it's fun to play with them sometimes and I am happy with the results. I applied a layer of gesso over the top of the sketched design. This helps to blend the colors later. It muted the lines a little, but I like that it's soft. Here is a closer look...


I absolutely love the new Fun In The Sun title. I backed the middle with a blue watercolor pattern paper. I felt I needed to bring in a little more blue besides the blue in my photos.


I backed the alphas with a script pattern paper in white. I wanted to keep my layout bright and airy.


If you are interested in seeing my process video here is the link to my YouTube channel.


Here are the digital cut files I used today ...


Thanks so much for stopping by. I hope you will try using a sketch pen in your die cutting machine. It's really easy to do.

Friday, December 9, 2016

Looking For The Perfect Tree - JustNick Studios Giveaway Day 9

Hello blogging friends!  I hope you have been enjoying the 12 days of Giveaways  at JustNick Studios.

For day 9, Nicole sent me this awesome Holly Background 2 cut file to use. I thought it would be fabulous used as a frame for my layout. I am using my Clique Kits, Clique into the Holidays Kit featuring Crate Paper's Snow and Cocoa collection. I love the outdoorsy animals and thought it would be fun to dig out an old photo to scrap anew. I am so thankful for my Mother-in-Law who took pictures of our family. Without her I doubt that there would be any photos of me! I am always the one taking pictures!!


I also used Tree Trio 2 and Snowflakes. I cut the snowflakes out from heavy cardstock and used the negative space as a stencil! Here is a closer look.


Here are all the cut files I used today ...


Today’s design – Holly Background 2 - is yours for FREE today only!
Just enter code: HOLLYFREE at checkout to get this design for free.
This code is only valid until midnight CST on December 9th, 2016.
No purchase necessary.
The design will still be available in the JustNick Store for purchase after the discount code expires.

Thanks so much for stopping by today. Have the Happiest of Holidays!!

Tuesday, July 5, 2016

Oh Snap - Clique Kits inspiration

Hello blogging friends!

I am back today with some more layout inspiration with the awesome 
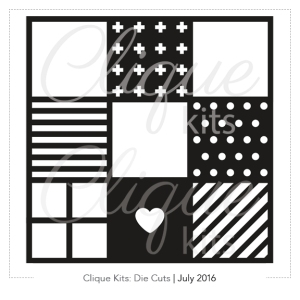
July Clique Kit Raskog! This is my 4th layout with the kit and I am amazed how much paper I have left! On this layout I decided to add some texture to my background with some modeling paste and a stencil I created from one of the digital cut files this month.  I used the plus signs from this cut file.

  CK_orig 

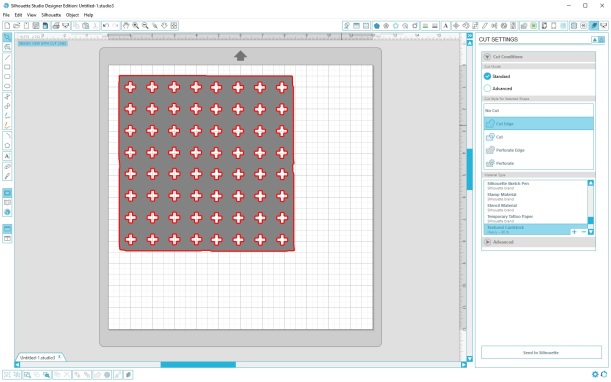
I erased all but the plus signs and duplicated and welded the cut file. Here is what it looked like when I was ready to cut it out ...

  Silhouette_MakeYourOwnStencil  

Since I was going to use this as a stencil, it didn't matter what paper I used, so I used a piece of white cardstock that had gotten dirty. If you want to keep the stencil and reuse it, try cutting out of acetate... like the yellow sheet that came with this month's Clique Kit. 
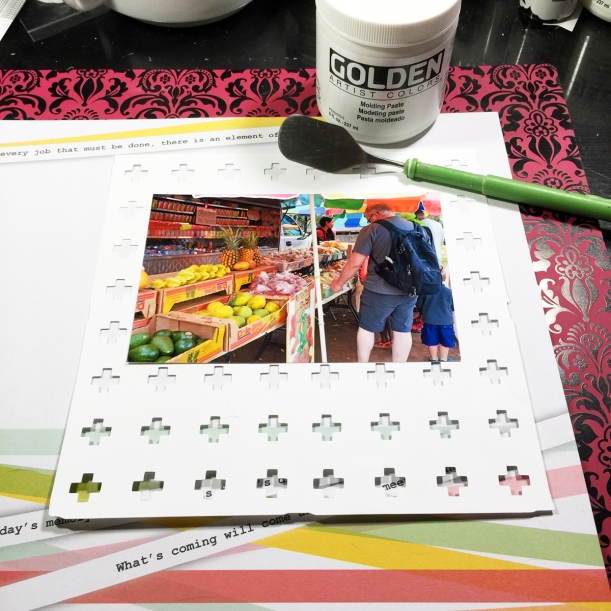
I arranged the stencil over my background paper, using my photo as a guide. I didn't need to get modeling paste behind my photo, but I wanted to make sure I was creating texture all around it.

  OhSnap_stencil1 

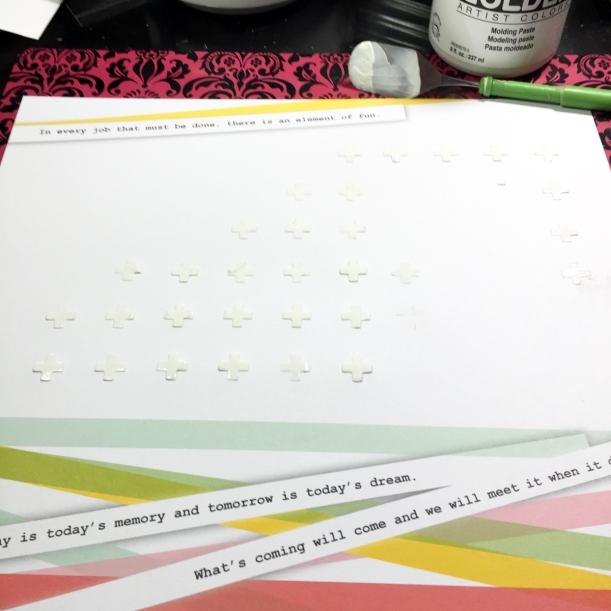
This is what it looked like after applying the modeling paste.

  OhSnap_stencil2 

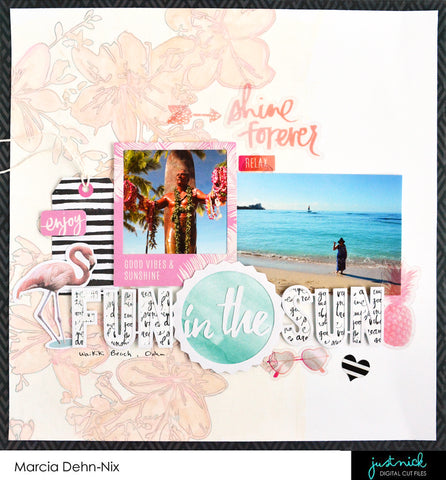
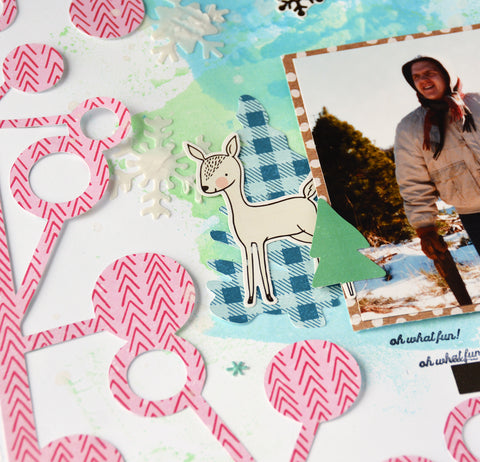
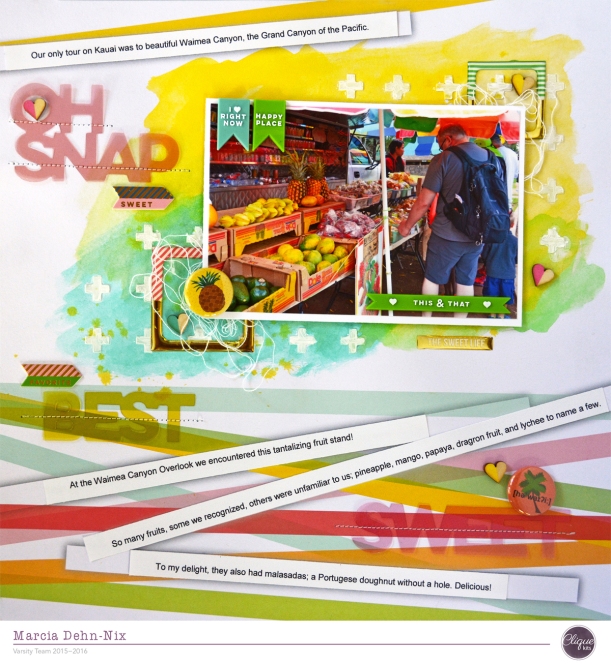
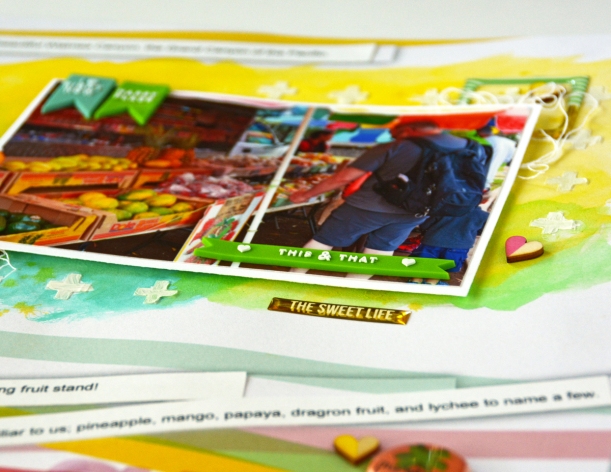
I watercolored the background using a couple different colors to help draw the eye to my photo. Here is the finished result...

  OhSnap

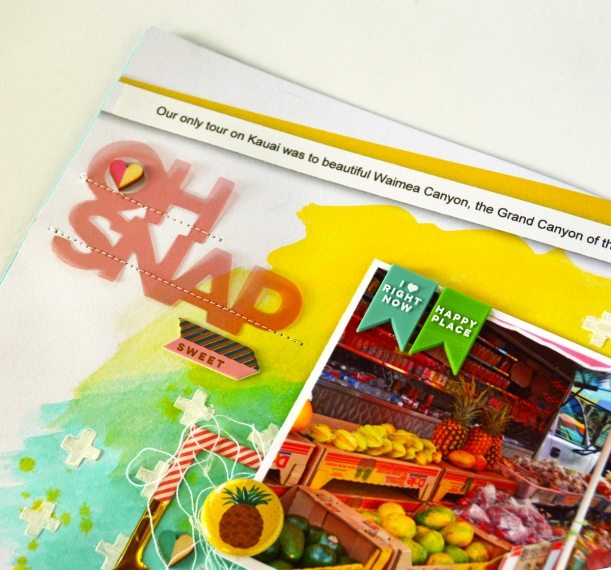
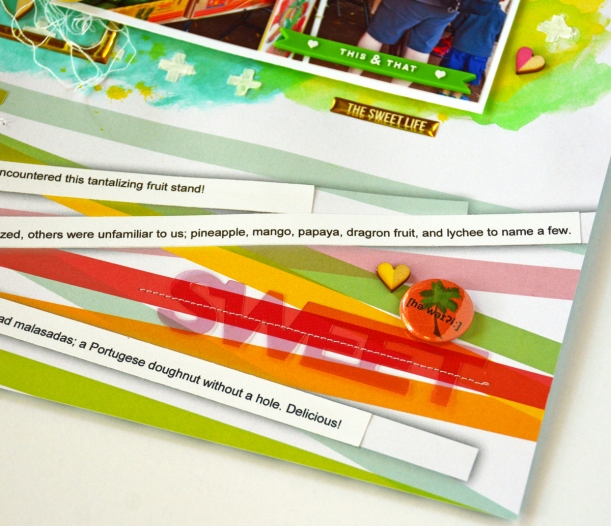
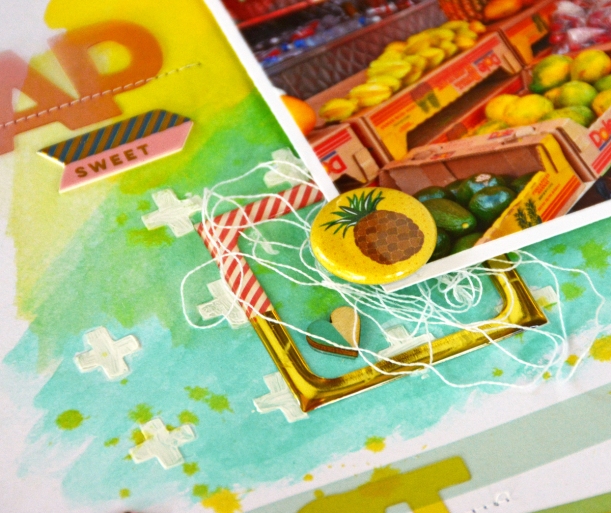
I let those acetate words be my title and embellished with the rubber charms, the acrylic add on frame stickers, some cardstock stickers, and 
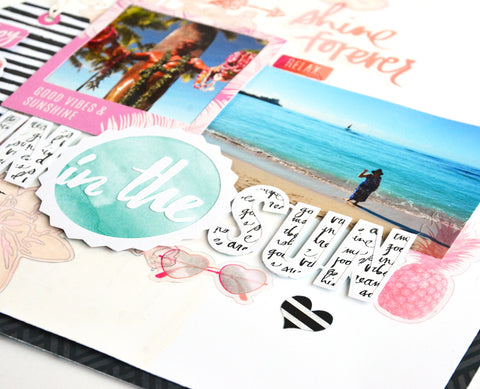
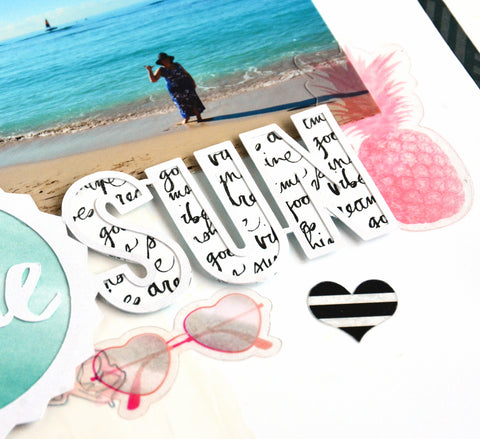
wood veneer hearts from the Pinkfresh Felicity collection. The flair is from my stash ... I used all my flair in the kit already except for one and it did not fit this vacation layout. Since the background paper word strips did not fit my photo .... I did some journaling on my computer and cut out strips to place over the top. Here are some close-ups...

  OhSnap_Detail2

OhSnap_Detail1

OhSnap_Detail3

OhSnap_Detail4  

Thanks so much for stopping by today! Clique Kits are Buy One Get One 1/2 off this week only!! What an incredible deal. Shop early for best selection.

~Marcia