Showing posts with label Glue Dots. Show all posts

Wednesday, December 11, 2013

Silver and Gold - Quick Quotes Tags

Hello Quick Quotes friends.  I have a pair of gorgeous tags to share with you. These are really going to make a statement on some of my holiday gifts. The first tag is accented in gold; gold ribbon, gold jingle bell, and gold touches on the flowers and edges of the tag ....


This Santa came from a vellum quote. Isn't he fabulous! I created some handmade flowers to embellish the tag and used my Powderpuff inks and some Inca Gold rub to accent them. Getting the paper wet helps you to mold them into shape. The red paper is actually packaging from a vellum quote. It was too pretty to toss out. I love how they turned out...


The second tag was created with papers from last years Club Q. This one is accented in silver; silver ribbon, silver sequins, and silver paper.


I cut the skates with my Silhouette, then laced them up with DMC floss. Some stamped snowflakes and glitter give it some sparkle. I even put some glitter on the skate's blades so it looks like ice.


Quick Quotes Supplies:
Magic of Christmas (Club Q papers)
Dear Santa vellum
Holidays Quotes bundle
Red music note paper from packaging of Clock vellum
Powderpuff chalk ink kin Tahiti, Biscotti, and Coal Miner

Other Supplies:
White, black, silver cardstock
Silhouette
DMC floss
silver ribbon - Really Reasonable Ribbon
Gold metallic ribbon
Sequins - Studio Calico
gold brads
jingle bells
coarse glitter
Inca Gold Rub
Glue Dots vellum adhesive

I am linking up at Really Reasonable Ribbon for their fun Bingo Challenge. Santa tag - Polka dots, Flower, Glitter and the Skate tag - Glitter, Image-Text, White.

There is plenty of time still for you to make some Holiday tags too. Have a great day!
~Marcia

Wednesday, October 30, 2013

Living a Dream - Quick Quotes

Hello blogging friends. I have a fabulous Quick Quotes layout to share with you using the new Back to Basics collection. This collection is so versatile you could use it for almost anything. I am also using some chipboard pieces from older Club Q kits as well as some other goodies from my stash.

I am scrapping my son's girlfriend, who interned this summer in Missouri at the World Bird Sanctuary. She learned how to care for raptures and did some educational outreach, teaching others about these fabulous birds. I love these photos, they really convey her confidence and love for what she does. That smile says, "Yeah, I got this!"


Here are some close ups. Designers Note: The circles were stamped with Java Powderpuff Chalk ink using things like the cap to my glue bottle and a sponge dauber turned upside down.


I used a vellum quote from the Babies/ Kids/ Family Itty Bitty Vellum Quotes Box Set and mounted it on the same paper I used for my background. The quote was perfect. She's not my kid, but kudos to her Mom and Dad for letting her go hundreds of miles away and supporting her while she was there. (She was not paid for her internship or provided meals)


I used this fabulous sketch by Karan Gerber for Sketchabilites


Quick Quotes Supplies:
Back to Basics Pattern Paper
Babies/Kids/Families Itty Bitty Vellum Quotes Box
Powderpuff Chalk Ink in Java and Biscotti
Ribbon - past Club Q kits
Chipboard pieces - past Club Q kits

Other Supplies:
Studio Calico Mister Huey's Spray Mist in Warm Calico
Tim Holtz Washi Tape (newsprint)
Recollections Washi Tape (birds)
Basic Grey String Clasps
Kaisercraft Wooden Bird Cages
Prima Say It in Crystals
October Afternoon Mini Market Alpha Stickers
Magic Mesh
Glue Dots vellum adhesive

Thanks for stopping by,
~Marcia

Friday, October 18, 2013

It's Beginning To Look a Lot Like Christmas - Scraptown Lady

Ok, I know its not even Halloween yet. I just couldn't help myself when I saw the gorgeous Authentique Peaceful collection that Cheryl at Scrap-Town-Lady sent me. Those papers reminded me of the first snowfall of the season. Fresh white snow where you can still see the green grass, just a little. And a little snow in December just gets me in the mood for all things Christmas; shopping, baking cookies, decorating the house. Does it inspire you in the same way?
I wanted to scrapbook a photo I took last winter of the first snowfall; the view out my front window. This was no ordinary first snowfall, we got 14" of snow here in Minnesota. BTW, it still looked like this in April.
I thought spring would never come.


I played up the snowflakes and the pine sprigs to embellish my layout. The snowflakes are a Tim Holtz die and the pine sprigs were a Silhouette cut. I used this sketch from Heather at Bird Is The Word. I flipped a portion of it to suit a horizontal photo. The latest word is Inspire, which I used in my journaling.


There are a lot of background details. I created negative space with a punch, and then used those punched out snowflakes to layer on top.


Some little wood veneer birdies were a must too.


Then I made a Z-Fold gift card holder with my scraps...


It's tied shut with this pretty Hug Snug Ribbon. When its open, it looks like this. Each section is a 4x4 square. Super easy to make.


I used a blanket stitch around my gift card insert to keep that card secure. A hole punch in the middle makes it easier for the recipient to get that card out. Instead of a gift card here, you could place a photo instead and use it as a Christmas card.


ScrapTown Lady Supplies:
Authentique Peaceful Frost
Authentique Peaceful Solitude
Authentique Peaceful Chill
Authentique Peaceful Cozy
Authentique Peaceful Freeze
Impression Obsession Bare Tree
Bazzill cardstock in Black
Ranger Distress Ink in Peeled Paint
Prima Chalker in Black Coal
Hug Snug Ribbon in Black
Glue Dots  
Scrapbook Adhesives  Foam Squares  
Scotch Quick Dry Glue

Other supplies:
Martha Stewart Snowflake punch
Tim Holtz snowflake die
Spellbinders scallop die
Silhouette
hemp
Prima wood veneer birds
Crafter's Workshop template tree
Cosmo Cricket alpha stickers 
Sewing machine
gesso
Core'dinations cardstock

Are you ready for some snow yet? Be prepared. Stock up on scrapbook supplies in the Scrap-Town-Lady store so if you are snowed in, you can scrap away :)
~Marcia

Saturday, October 5, 2013

World Card Making Day

It's World Card Making Day today! Are you going to make some cards today?

I love Halloween. It's such a fun holiday. So I decided to make a Halloween card using the Imaginisce Monster Mash collection. This card was cut with my Silhouette. I used a little vellum behind my web so that I could add some i-Rock gems.
I even decorated the inside :)


Supplies:
Imaginisce Pattern Paper: Monster Mash, Outdoor Adventure, Stickers: Love You More; i-Magicut; i-Rock; Lighted Tweezers; black and red gems
Bazzill cardstock; Silhouette cut file; Quick Quotes Chalk ink in Coal Miner; May Arts Ribbon; Maya Road hat pin
; vellum; Pink Stamper Halloween stamps; Versamark ink; Black embossing powder


Be sure to check out all the other designer's cards on the Imaginisce blog too. They are awesome!
Linking up to Paper Issues Halloween Hootenanny!

ScrapTown Lady. is particapating in the Operation Write Home blog hop today. Operation Write Home donates cards to service men and women. You can volunteer to make some cards if you want :)  My Girl Scouts did this several years ago. This is the shabby card I made using the BoBunny Prairie Chic collection and lots of fun dies.


Love these rolled roses ...


Did you know Operation Write Home has tons of great card sketches! I based my card on this awesome sketch....


ScrapTown Lady Supplies:
Bo Bunny Prairie Chic Calico
Bo Bunny Prairie Chic Chic
Bo Bunny Prairie Chic Garden
Bo Bunny Prairie Chic Laundry
Cheery Lynn Mini Fanciful Flourish  
My Favorite Thing Die-namics Fishtail Flags  
My Favorite Thing Die-namics Mini Royal Rose
Kaisercraft Pearls in Champagne
Glue Dots Mini
Inkssentials Pop It Foam tape

Friday, September 13, 2013

First Day Of School - Scrap Town Lady Has Graphic 45 ABC Primer!

Wahooo! It's finally Friday. Who's got plans to scrapbook this weekend? I have another ScrapTownLady layout to share today.

In my neck of the woods, kids go back to school after Labor Day. I thought a lot of you might have some Back to School photos you need to scrap. The Graphic 45 ABC Primer collection is just what you need. I used it for this layout of my kids on the first day of school. This is an older photo, from when my son was just starting Kindergarten. All 3 of my kids are in college now! Can't you tell how excited he is. My oldest daughter, not so much. Otherwise, maybe it just wasn't cool to be excited. lol.


I think Graphic 45 was the first to start the trendy, chalkboard craze with this collection. One of my favorite things about Graphic 45 papers is fussy cutting them. How can you not when they have such adorable images on them...


Here is my fussy cutting tip.... Don't try to cut on the line, but just a bit outside. Then you won't lose any of the definition. Then use some foam adhesive to give it some dimension so it really stands out.


I used some My Favorite Things dies here too for my flags and flourish. If you are just starting out and wondering what dies to get, let me tell you, I use these dies all the time for cardmaking and scrapbooking.

Scrap Town Lady supplies:
Graphic 45 ABC Primer An ABC Primer
Graphic 45 ABC Primer One, Two Buckle My Shoe
Graphic 45 ABC Primer Grammar School
Graphic 45 ABC Primer Building Blocks
Graphic 45 ABC Primer Games and Playtime
Graphic 45 ABC Primer Bedtime Stories
Graphic 45 ABC Primer ABC Primer Chipboard Die Cuts 2
Bazzill cardstock in Black
My Favorite Things Die-namics Fishtail Flags
My Favorite Things Die-namics Fancy Flourish
Farm House Market Square Flowers
Distress Ink in Tea Dye
Glue Dots
Inkssentials Foam Shape adhesive
Scotch Quick Dry glue

Hope you have a great weekend! I think I will try to get out to an apple orchard :)
~Marcia

Wednesday, August 21, 2013

Be You - Pink Paislee's at Scrap Town Lady!

Wahoo, It's Wednesday! That means I finally get to share my Scrap Town Lady layout with you today. Sometimes when I create a layout I love, I can't wait to share it with everyone. So I am thrilled to share this layout I created with the new Pink Paislee Cottage Farms collection. This is my first time creating with a Pink Paislee collection. Have I been living under a rock? I love Cottage Farms!! The cutie in the photo belongs to a friend of my daughter. My daughter actually took the photo this past weekend when she visited them.


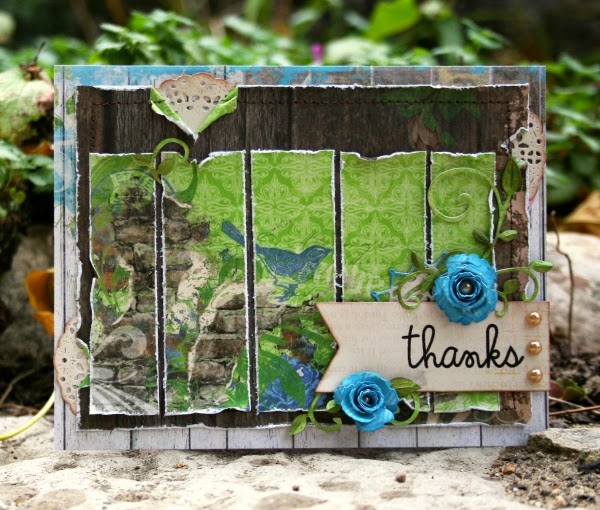
This collection has lots of really fun elements, like the polaroid frames and the rub-ons. I placed my polaroid frames at the top and bottom of my layout. They are fabulous decorative pieces on their own, so I thought it would be fun to use them without placing a photo in them. Some stitching on the frame adds some texture. I used some thread from some burlap trim. Let me show you some close-ups. This photo shows the detail in the Cheery Lynn Anastasia border die. It's gorgeous. I am also using My Favorite Things Die-namics for the flourish and the flags. This flag die is a must for scrapbookers and card makers alike.


I placed a rub-on here along the edge of my photo and layered some Cottage Farm's Ephemera dies on top.


I love rub-ons. Did you know you can place a rub-on on top of another rub-on!


These flowers are from Farm House papers but work perfectly with the Pink Paislee Cottage Farms collection. Banners are still popular too, and this die from My Favorite Things Die-namics makes the cutest banners.

Scrap Town Lady Supplies:
Pink Paislee Cottage Farms Barrel
Pink Paislee Cottage Farms Basket
Pink Paislee Cottage Farms Crate
Pink Paislee Cottage Farms Bushel
Pink Paislee Cottage Farms Market
Pink Paislee Cottage Farms Wheelbarrow
Pink Paislee Cottage Farms Press On's
Pink Paislee Cottage Farms Photo Frames
Pink Paislee Cottage Farms Ephemera
My Favorite Things Die-namics Fishtail Flags
My Favorite Things Die-namics Banner Day
My Favorite Things Die-namics Fancy Flourish
Cheery Lynn Anastasia Border
Farm House Market Square Flowers
Basic Grey Lucille Vintage Buttons
Distress Ink in Wild Honey and Tattered Rose
Glue Dots
Inkssentials Foam Shape adhesive
Scotch Quick Dry glue

Thanks for stopping by. Make sure you stop by the Scrap Town Lady store and check out the new products arriving, or even older products you've decided you can't live without ;)
Have a great day!
~Marcia

Wednesday, August 14, 2013

Happy Day - Scrap Town Lady

Oh Happy Day! Scrap Town Lady has the new My Mind's Eye Lost & Found 3 Oliver collection and I got a chance to play with it!!
Yesterday was my niece's birthday, so I made her a birthday card. You really need to browse the Scrap Town Lady store to see all of the pattern papers in this fabulous collection. I love the blue and yellow color combo and when you add a little glitter it becomes amazing! Being a scrapbooker first before getting into making cards, I still like a larger canvas to play on. This is a 5" x 6.5" card. The larger card size works well with 12 x 12 scrapbook papers which is what I used here. I took advantage of the collage of elements on this sheet of pattern paper and layered a few die cuts on top. The Bird Cage and Doily are from Cheery Lynn and the Fishtail Flag is from My Favorite Things.


Here is a tip for cutting a notch in washi tape. Adhere the end of the washi tape to a scrap of paper. Slide this scrap of paper into a corner of a square punch (turned upside down so you can see what you are doing). Now you can punch through the washi tape without the tape getting stuck in your punch. Carefully peel from the paper and apply to your card. Give it a try.

Scrap Town Lady Supplies:
My Mind's Eye Lost & Found 3 Oliver Bingo
My Mind's Eye Lost & Found 3 Oliver Blue Lace
My Mind's Eye Lost & Found 3 Oliver Chipboard Elements
My Mind's Eye Lost & Found 3 Oliver Decorative Tape
My Favorite Things Die-namics Fishtail Flags
Cheery Lynn French Pastry Doily
Cheery Lynn Bird Cage
May Arts Sheer Ribbon With Ruffled Edge in Antique Gold
Ranger Distress Ink in Tea Dye, Pumice Stone, Stormy Sky
Glue Dots 3/8"

Enjoy the rest of your week!
~Marcia