Showing posts with label Graphic 45. Show all posts

Tuesday, October 24, 2017

Too Cute To Spook - JustNick Studios

Hello blogging friends!

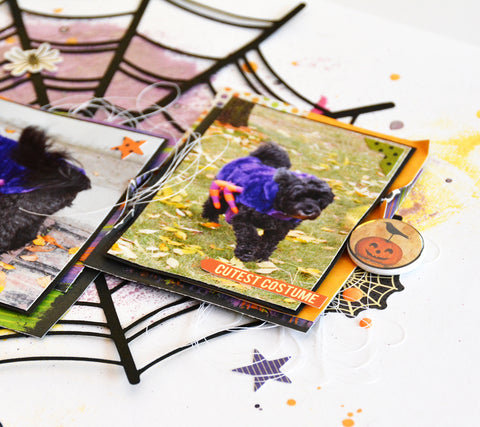
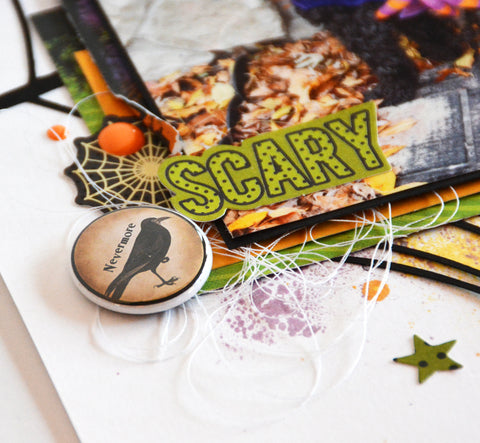
It's Halloween week at JustNick Studios so I am back today to share an adorable Halloween layout with you. Since my dog Satchel likes to greet all the Trick or Treaters, I like to dress him up in costume too. The kids love it. Even kids who may be afraid of dogs are not so scared of him when he looks so funny. Seriously, there is nothing scary about my layout! Take a look.


I used the new Spider Web 2 digital cut file for that awesome web as well as the 31 digital cut file for my title and the cat die cut.


I turned my title into a layered die cut by creating a background shadow using the offset tool in Silhouette Studio. I love how it pops against the yellow ink on my background. The googly eyes add a nice touch of whimsy. You can create a whole new look, just by adding a shadow layer. 


Here are the digital cut files I used today ...


If you are interested in watching my process video check out my YouTube channel.


Thanks so much for stopping by today! Have a Spooktacular week!!

Saturday, October 21, 2017

I Like Fall Most Of All - Stash Bash YouTube Hop

Hello everybody!

I am back to Stash Bashing this month. This time my designer friends and I are focusing on our 6x6 paper pads. Besides making cards, I love using my 6x6 paper pads to back my digital cut files, like these awesome fall cut files from JustNick Studios.


I also used a 6x6 sheet of pattern paper to cut out my title; I Like Fall Most Of All. I thought it would really pop against my mixed media background, but not so much ... so I outlined the title with a brown marker.


These big flowers from the In Bloom cut file reminded my of sunflowers, so I backed them with yellow pattern papers. The leaves I backed with an assortment of green pattern papers from a variety of manufacturers; Fancy Pants Designs, Simple Stories, Basic Grey, Graphic 45, and Carta Bella.


I tried to get my hubby in on this photo, but he just laughed at me. I was laying down in the grass watching the leaves fall. It seemed appropriate that I add a few leaves in here as well.


I wanted to list some of my Fall favorites in the white space of my photo ... of course Pumpkin Spice is at the top!!


This little fox was irresistable! He is a leftover from last year's Simple Stories Fall collection. Those gorgeous epoxy stickers are from the Carta Bella Hello Fall collection.


Here is my process video where you can see how I created that mixed media background and links to the other designer's videos as well ...


Thanks so much for stopping by!
~Marcia

Wednesday, September 9, 2015

Happy Halloween! - Top Dog Dies

Hello blogging friends!

I am back today with another Top Dog Dies card from the Fall and Halloween release. I couldn't wait to use this Halloween die set and the Wicked Witch die set! Isn't that spider adorable.

This witch had a little too much of that witch's brew, lol.


I die cut the legs twice, once from orange and once from black. Then I cut the orange into strips to make the striped stockings for my witch. This was easy to do as the die cut indicates where to cut.


A little Wink of Stella Silver makes the spider eyes pop.


Supplies:
Top Dog Dies Wicked Witch die set
Top Dog Dies Halloween die set
Top Dog Dies Spiders die set
Top Dog Dies Typewriter Uppercase die set
Top Dog Dies Typewriter Lowercase die set
Pattern Paper: Webster's Pages, Graphic 45, and Authentique
Cardstock: American Crafts, Bazzill

Thanks for stopping by. Be sure to check out the Top Dog Dies store to see all the new dies. You will LOVE them!
~Marcia

Tuesday, September 8, 2015

Eek - Top Dog Dies Tutorial

Hello blogging friends!

Top Dog Dies just released their Fall and Halloween dies and I am so excited about them! I love crafting for Halloween. Take a look at the new Top Dog Dies Spider die set
Don't you love the spider web. I thought it would look great in vellum. Here is a card I created with it using the new Graphic 45 Rare Oddities paper.

 
One of the things I love to do with my die cuts is to add glitter to them.


Here is how you can achieve this look too,

1.  Choose a cardstock color that closely resembles your glitter color.


2.  Run the cardstock through a sticker machine like this Xyron Create a Sticker machine.


3.  Arrange the dies on top of the cardstock and create your die cutting sandwich.


4.  Now place the die cuts face down and run them through the Xyron Create a Sticker machine one more time.


5.  Peel paper off the top side of the die cut and place face down in glitter.


When you are ready to adhere to your card, peel the paper away from the back side of the die cut.


Thanks for stopping by today.
~Marcia

Monday, August 17, 2015

Twinkle Twinkle Little Star - Xyron and Craftwell

Hello blogging friends!


Xyron is teaming up with Craftwell all this week and today I get to share what I created with one of their embossing folders. I used the Star folder which will be coming to stores soon, I promise. It's a new release.


Those stars had me thinking....Twinkle Twinkle Little Star, so of course I had to dig out my Graphic 45 Mother Goose collection to see what I could find. Here is the card I created.


I love how it turned out, don't you. Let me show you how I created it.

Supplies you will need:
Xyron new Creative Station with 9" and 5" permanent adhesive
Xyron Mega Runner
Xyron Adhesive Dots
Craftwell Stars Embossing Folder
Pattern Paper
Core'dinations Cardstock
Big Kick or other machine for embossing
Distressing Tool
twine
button
scissors
paper trimmer

Step 1.  Trim down a piece of cardstock the width of your embossing folder and run it through your embossing machine.


Step 2. Use a distressing tool to sand the raised stars, allowing the core color to show.


Step 3. Cut a piece of pattern paper slightly larger that the embossed cardstock. Run both pieces through the new Xyron 9" Creative Station. Adhere the embossed cardstock on top of the pattern paper.


Step 4. Die cut a pennant flag. I use washi tape to hold my die in place. This is especially helpful with pattern paper like this, so I can be sure to get everything straight.


Step 5. Trim the journal card with the little boy looking out the window. Since there were two, I took the second one and fussy cut just the boy and the blanket out.


Step 6. I like dimension, so I adhered the boy on top of the journal card using foam squares and then adhered him to my card with foam squares also. I used my Xyron Mega Runner to adhere the flag in the upper left.


Switch out the 9" adhesive for the 5" adhesive. It is so easy to do. Open the top, pull out the 9" roll, flip up the green 5" guide, pop in the 5" roll, and close the lid. Easy Peasy.


Step 7. Run the card front through the Xyron Creative Station with the 5" adhesive roll in place and mount to card base.


Step 8. Tie a bow with some twine. This is my secret to creating the perfect bow; it's a Bow-Easy. Add a button to the middle of the bow.


Step 9. Adhere the bow and button using Xyron adhesive dots. Don't touch the adhesive dot, but instead set the backside of the bow on top of the dot, then pull gently off.


Step 10. Adhere a chipboard flag on top of the other flag using the same adhesive dots.


Thanks for stopping by, Go check out the Xyron and Craftwell Facebook pages all week long to see more inspiration.

~Marcia

Tuesday, June 30, 2015

Xyron and Spellbinders Blog Hop

Hello blogging friends! Exciting things are happening this week... It's the Spellbinder's Partner Blog Hop!!!


Xyron is participating in the Spellbinders 2015 Summer Road Trip Blog Hop.  There are 11 companies and amazing tutorials that will be shared over the course of the next three days.  Our friends at Spellbinders have provided two of our Design Team members with dies and as you will see, they work so well with Xyron adhesive!  They have also come out with a new machine, Sapphire!  Sapphire is an easy to use manual die cutting machine for beginners that cuts and embosses paper and other materials.  It cuts and embosses using dies up to 2  1/4” wide with the turn of a handle. It also has coordinating Sapphire™ blue dies.  You can use the machine with the NEW blue Sapphire die templates, as well as with most Spellbinders and other leading dies.  The Sapphire™ machine and the Sapphire™ dies are sold exclusively at Jo-Ann craft stores and Joann.com. Visit www.SpellbindersCreativeArts.com/Sapphire to learn more. 

There are giveaways from Xyron and Spellbinders at the end of this post so stick with me ok!

Now let me show you what I created. I used my new Xyron Creative Station to create a mini album with the Spellbinders Sapphire Simply Tags dies.

One of the things I love is that the inner die fits perfectly on the outer tag dies. It's perfect for card sentiments or for my mini album to indicate locations. My daughter is galavanting all over Europe at the moment. It's her last summer of freedom before heading back to graduate school and then work to pay off all her college debt. She is half way through her trip now. I am selecting one photo from each location for the mini album.


So here is how I created my mini album. 

Supplies:
Imaginisce Perfect Vacation 6 x 6 Pattern Paper Pad, Die cuts
Bazzill cardstock in a navy blue
twine

Step 1.   I opened a word doc and typed up all the locations leaving enough room around them to be able to die cut them out. Then I selected the inner dies I wanted to use. To keep the dies from moving when I die cut them, I used washi tape to keep them in place. Just be careful not to put washi tape over the printed text. I used a blue cardstock with the outer dies.


Step 2.  I ran the printed text die cuts through my Xyron Creative Station and adhered them on their blue die cut counterpart. I have the 5" permanent adhesive in my Xyron Creative Station at the moment. The new Creative Station will work with both the 5" and 9" cartridges that fit the older style models. One machine that does the work that 2 machines used to! Once the text was adhered to the blue die cut tags, I ran them through my Xyron Creative Station again.


Step 3.  I trimmed some pattern papers to 4x6 size. This will closely fit the Graphic 45 chipboard mini album I am using. I swapped out the 5" cartridge for the 9" cartridge and ran my pattern papers and some photos through. With the Xyron adhesive I don't have to worry about glue ripples. I get smooth edge to edge adhesive coverage.


Step 4.  I adhered the papers or photos on the chipboard and using a scissors, trimmed away the excess. Then I cleaned up the edges with my Imaginisce d-stress tool. The d-stress tool came in handy too for cleaning up the holes as well. In this photo, you can see how little I had to trim away.


The hardest part of this project was selecting only one photo from each location! It will be easy for my daughter to add more photos later if she wants.

Now for the fun part!  
Spellbinders is hosting a giveaway to celebrate the festivities.   To enter the contest, please click on this link .

For this hop there will be 3 daily winners chosen and 1 Grand Prize winner:

The daily winners will receive product from each of the companies featured on that day. For example, the Day 2 winner will receive the products from May Arts, DecoArt, Chameleon, AND Xyron, AND the Spellbinders Sapphire dies. Since I featured the new Xyron Creative Station, that is what Xyron is giving away!

The Grand Prize winner will receive product from companies from all 3 days + a Sapphire machine. 

Be sure to check out the other partners participating today to see their creations and enter their giveaways!

May Arts

DecoArt
Chameleon
Karen Jiles (designing for Xyron) 

For the contest rules please click here.

Thanks for stopping by!
~Marcia