Showing posts with label DCWV. Show all posts

Tuesday, October 24, 2017

Too Cute To Spook - JustNick Studios

Hello blogging friends!

It's Halloween week at JustNick Studios so I am back today to share an adorable Halloween layout with you. Since my dog Satchel likes to greet all the Trick or Treaters, I like to dress him up in costume too. The kids love it. Even kids who may be afraid of dogs are not so scared of him when he looks so funny. Seriously, there is nothing scary about my layout! Take a look.


I used the new Spider Web 2 digital cut file for that awesome web as well as the 31 digital cut file for my title and the cat die cut.
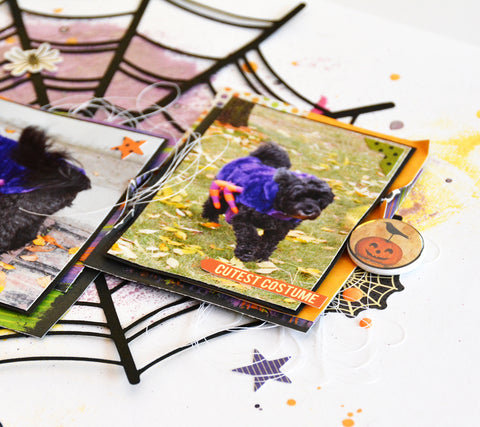

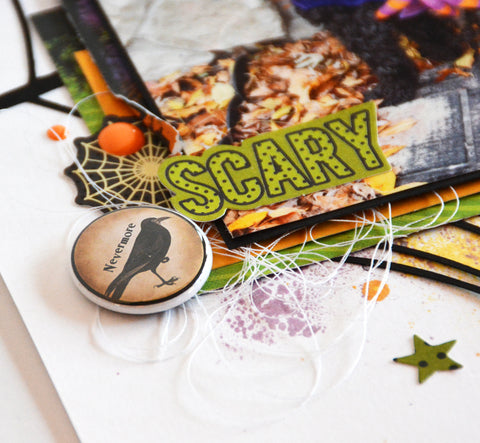


I turned my title into a layered die cut by creating a background shadow using the offset tool in Silhouette Studio. I love how it pops against the yellow ink on my background. The googly eyes add a nice touch of whimsy. You can create a whole new look, just by adding a shadow layer. 


Here are the digital cut files I used today ...


If you are interested in watching my process video check out my YouTube channel.


Thanks so much for stopping by today! Have a Spooktacular week!!

Thursday, July 30, 2015

Whale Party Favor - Xyron and DCWV

Hello blogging friends.

Xyron teamed up with DVWV and I got a chance to play with their DIY Project Stacks Favor Boxes.
DCWV DIY Project Stack: Favor Boxes, , hi-res
There are lots of different patterns for favor boxes and bows too as well as paper. Here is what I created ...


Isn't this whale adorable!!!  It would be so cute as a party favor at a kids birthday party. Want to know how I made it?

Step 1.  Trace whale pattern onto pattern paper and cut out. You could also use the box (without the tail) and place a rabbit, or butterfly, or heart on top in place of the spout. Note... Cut 2 of the spouts, flipping the pattern upside down for the second one so it is a mirror image of the first.


 Step 2.  I like to ink the edges of my paper for a more finished look.


Step 3. On the back side of the box, score a square in the middle.


Step 4.  Using my Xyron Mega Runner, I adhered the whale tail to the bottom of the box.


Step 5.  I used my Xyron Teresa Collins Stapler to attach the spout to the box. In hindsight, I wish I would have traced the spout on the box before cutting it out so I could eliminate this step.


Step 6.  Place some Xyron Double-sided High Tack Tape on each side of the notch to keep the box together.


Step 7.  Assemble the box by adhering the notched sides on top of eachother, over the Xyron Double-sided High Tack Tape.


Step 8.  Pull the spouts through the notch, No need to glue them. For kid appeal I added googly eyes.


Supplies:
Xyron Mega Tape Runner
Xyron Double-sided High Tack Tape
Xyron Teresa Collins Stapler
DCWV DIY Project Stack Favor Boxes
googly eyes
Quick Quotes Powderpuff Chalk ink in Baja Blue

Thanks for stopping by. Be sure to check out the Xyron Facebook wall to see what the other designers created with their DCWV Stacks.
 ~Marcia

Saturday, June 20, 2015

Masculine Birthday Card - Xyron and DCWV

Hello blogging friends. I have a card to share today that I made with the DCWV Hey Sailor Stack papers and stencils, and my Xyron adhesive. The Hey Sailor Stack is perfect for masculine cards or layouts. I decided to make a birthday card.


Let me show you how I created my card...

Step 1.  Trim the anchor image from the 12x12 paper and tape to back of stencil. I like to use washi tape.


Step 2.  Flip the stencil over. I used BoBunny's Gold Glitter paste, but any molding paste would work.

Step 3.  Apply a liberal amount of paste over the stencil using a spatula. Remove stencil and wash off the excess paste. Set the paper aside and let the glitter past dry.


Step 4. Cut striped paper 5" x 6.5" and using the Xyron Mega Runner apply it to the card base. Trim whale paper into 3 strips each measuring 1.5" x 5". Notch one end of each strip of the whale paper. I like to notch my paper strips using a square punch turned upside down so I can see where the punch will make its cut. Adhere notched paper strips to card base using the Xyron Mega Runner.


Step 5.  Place the 5" cartridge into the Xyron Creative Station. Run the anchor paper through the Creative Station.


Step 6.  Cut a piece of fish net and adhere to the sticky back side of the anchor paper. Add some foam squares and mount to card base.


Step 7.  Cut "Birthday" from gold paper using Silhouette Cameo. Run the die cut through the Xyron 2.5" Create A Sticker Maker. Adhere to top of anchor.


The DCWV stencils were so fun to play with. I also used them to add gold glitter paste to a photo. I love how it turned out. You can see this layout here if you are interested.


Xyron Products Used:

Other Products Used: 
Gold paper
Fish Net
BoBunny Gold Glitter Paste
Silhouette Cameo
Foam Tape

Thanks for stopping by,

Thursday, June 18, 2015

You & Me - Cocoa Vanilla Studios

Hello blogging friends! I am having so much fun with the fabulous new Cocoa Vanilla Studios collections. I have a layout to share with you that I created with the gorgeous Hello Lovely collection. When I first saw the collection, I knew it would be perfect for scrapping some of my daughters wedding photos. I am so thrilled with how this one turned out....

  XOXO_MarciaDehn-Nix_CocoaVanilla 

There are so many gorgeous embellishments to coordinate with the Hello Lovely pattern papers; flair, ephemera die-cuts, flowers, enamel dots, wood veneers, and sequins. I used lots of the embellishments to set off my photo here.

  Flowers

I cut the "XOXO" background using a digital cut file from the new JustNickStudios shop... first from black cardstock and then I cut an outline only from vellum. I love the look of sequins underneath the vellum, with just a hint of sparkle. Some stitching with gold thread adds elegance as does my gold glittering title.

  XOXO_diecut 

  Detail1

Thank you so much for joining me today. Be sure to check out the Cocoa Vanilla store to purchase these lovelies.

 ~Marcia

Sunday, April 20, 2014

You Rock - Paper Issues

Hello blogging friends. I hope you all had a wonderful Easter. I enjoyed the day at my Mom and Dad's house with my extended family. I thought I would share an Easter tradition with you to see if any of you have ever heard of this recipe before.


We have this pastry every year called Yeast Kranz. My Mom says it is my Aunt's recipe and she was Polish. I found a similar one here at tastebook.com. (I use warm milk instead of water when making it). The inside is a meringue filling with cinnamon and sugar, dates, and nuts. Pastries were not allowed during lent, so this delicacy was made at Easter to celebrate the end of lent. It is yummy!

Today we also celebrated my nephew Max's 13th birthday!


I made him this card. Thank you Silhouette store for having a card I could use for a teenager!!!


I am linking up to Paper Issues Pitch Perfect issue.
You still have a week to link up your issue and join the fun.

Have a great week!
~Marcia