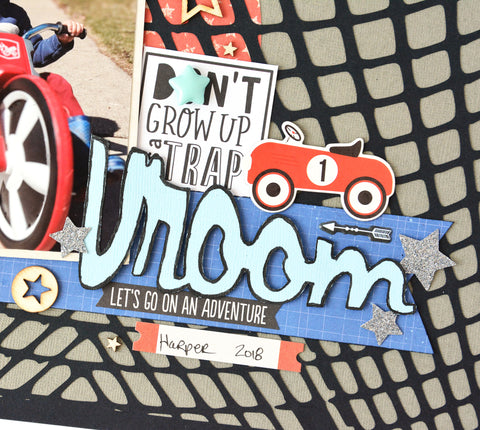
I am hoping it warms up enough here in Minnesota where the kids can be outside again riding their bikes. In the mean time, my Spring fever has me scrapping a photo of my nephew from last Spring. I thought the JustNick Studios Tread Background was perfect for this bike riding photo. I used the Simple Stories Cool Dude collection as well as some Cocoa Vanilla Studios Flying High and Totally Rad.

To get the tire treads to stand out, I backed the black tire tread design with a grey cardstock. I placed a red patterned paper circle between the layers before gluing them together. I didn't want to cover up too much of that tread design. Then my photo and embellishments went over that circle. I may have gotten a little carried away with the embellishing, lol.

I repeated the circle, adding a few more smaller circles in the opposite corner. Again, I went crazy embellishing the tops of these circles.

For my title, I warped the Vroom from the Planes Trains & Autmobiles cut file. I wanted the word to be larger starting out and get smaller. I thought it would help show movement. Here is how you can warp an object in Silhouette Studio.
1. Right click on the cut file and select Ungroup. Move the items you are not using off the grid.
2. Select the object to warp and click on the warp icon (last icon on the right).
3. Select a corner edit point and drag it outward. On the opposite end, select a corner edit point and drag it inward. Play around with the edit points until you like how it looks.
I didn't like how the stars looked warped so I trimmed them off. I replaced them with other stars from an ephemera pack. I edged the word with a black marker. This helps it pop as well as gives it a grungy feel.

I love how this turned out.

Check out the tutorial on how I warped my title in my YouTube process video.
Here are the cut files I used today ...


Thanks so much for stopping by.


No comments:
Post a Comment
I love hearing what you think!