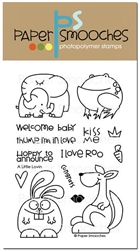
Today I have a Welcome Baby gift bag ensemble to share that I created with the Paper Smooches A Little Lovin stamp set and my new Xyron 9" Creative Station. This stamp set is so adorable, take a look...
Besides baby announcements and gift cards, this set would be perfect for some Valentines and more. I couldn't pass up a chance to practice my coloring skills on the elephants. I am by no means an expert. I think I need lots more practice, lol. I even used the Welcome Baby sentiment to decorate my gift bag.
I upcycled this brown bag, giving it new life as a gift bag. I love being able to reuse things some people would normally just throw away. Here is a tutorial if you want to see how I created my gift ensemble.
Supplies:
Small Brown Bag
Pattern Paper: Imaginisce My Baby collection
Cardstock: American Crafts
Paper Smooches A Little Lovin stamp set
Ranger Distress Ink, Inkadinkado black dye ink
Ribbon
Xyron adhesive dots
Step 1. Cut a piece of pattern paper slightly smaller than the front of the bag and stamp Welcome Baby using the Vintage Photo Distress Ink.
Step 2. Cut a square of pattern paper for the front of the bag (5"x5") and a piece of cardstock slightly larger. Also trim a piece of white cardstock for die cutting the doily.
Step 3. Run the larger piece of pattern paper through the new Xyron Creative Station with the 9" permanent adhesive loaded. Adhere this to the bag front.
Step 4. Switch to the 5" permanent adhesive an run the smaller pieces through, including the white cardstock for the doily. YES, the same machine can be used with both the 9" and the 5" adhesives! How cool is that!
Step 5. Die cut 2 doilies from the white cardstock with the adhesive already applied. Be sure to remove the plastic from the top first. We will use the second doily on the card.
Step 6. Assemble these piece on the front of the bag.
Step 7. Using a black dye ink, stamp the elephant images onto Copic coloring paper. We will need one for the bag and one for the card.
Step 8. Color your images and fussy cut them out. We will use the second elephant on the card.
Step 9. Using the Xyron adhesive dots, adhere the elephants to the bag front.
Step 10. Tie a bow. I like using this Bow-easy tool. Ties a perfect bow every time!
Step 11. Trim up the Ribbon edges. I am using my Imaginisce i-Magicut Ribbon cutter. It cuts and seals the edges at the same time.
Step 12. Ta Da! A beautiful bow!
Step 13. Adhere the bow to the bag with a Xyron adhesive dot.
Step 14. Trim a piece of cardstock and pattern paper for the card. My card base is 4.25"x8.5". Score it at 4.25".
Step 15. Run the card front through the Xyron Creative Station with the 5" permanent adhesive loaded. Adhere to card front.
Step 16. Adhere doily (previously cut) and elephants.
Step 17. Tie a ribbon and adhere using the Xyron adhesive dots.
Thanks for stopping by. Have a great week!


This is a cute set--gift bag and card that go together. The Xyron machine makes things so much easier.
ReplyDelete