Showing posts with label Christmas decor. Show all posts

Monday, December 25, 2023

Holiday Cards - Lori Whitlock

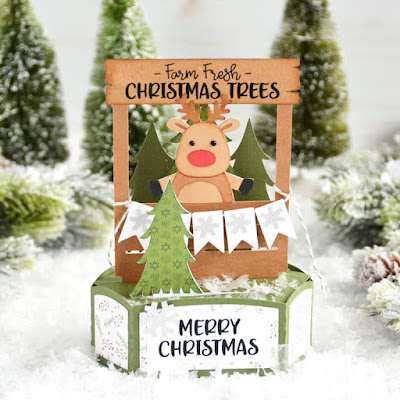
 Hello everyone! Marcia here today. I have some holiday cards to share with you today. No, it’s not too late to make and send holiday cards! New Year is a holiday so for me, it’s ok to send a card after Christmas. I love to send holiday cards to friends and family as well as receive them. I especially love a box card that can sit on a tabletop or counter and doubles as home decor. This Hexagon Pop-Up Christmas Tree Booth With Reindeer Card (SVGSilhouette)  and the Hexagon Pop-Up Santa's Workshop Card (SVGSilhouettecut files can be found in Lori’s Store along with many other varieties of holiday cards. I used the new Echo Park Paper Have A Holly Jolly Christmas collection.


Stop by the Lori Whitlock YouTube channel for  tutorial instructions on how to assemble the hexagon pop-up cards. Don’t worry about how you will mail it, because these awesome cards fold flat for mailing.
 
Thanks so much for stopping by,
~Marcia

Thursday, December 14, 2023

Santa Lighted Shadowbox Decor - Lori Whitlock Tutorial

 Hello friends. 

I am sharing a tutorial on the blog today for the new Holiday Lighted Shadowbox Decor pieces. You can purchase a bundle Here that includes a Turkey, Santa, Reindeer, Elf, Snowman, and Nativity Scene. I made the Santa (SVG, Silhouette) and boy is he spectacular!


These are pretty easy to assemble. Let me show you how.

1. Cut out all the pieces from desired pattern paper or cardstock. Be sure to scroll in Silhouette Studio to see all the pieces. There are 4 inserts, side panels, and the decorated front and back. We are going to assemble the side and back first Adhere your pattern paper panels to the cardstock back and sides.


2. Glue one side panel in place, adhering it to the tab with the four slits and then each tab working your way around to the other tab with four slits on the opposite side
.

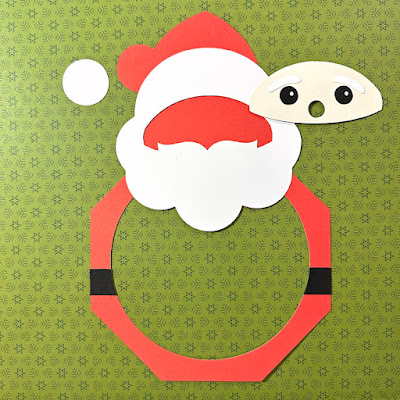
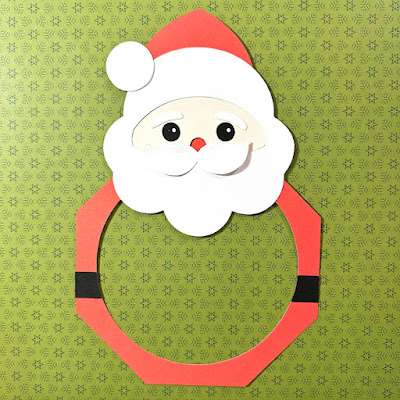
3. Let's assemble the front panel. We are going to start with Santa's face. The white paper goes behind the black. That goes behind the flesh colored face. Last, attach his eyebrows over each eye.


4. Adhere the black belt pieces on each side and the bottom of the beard. This allows you to fit the face piece in just so tucked under the mustache. Once the face is in there, go ahead and adhere the hat brim down along with the white pompom. Lastly, add the mustache.


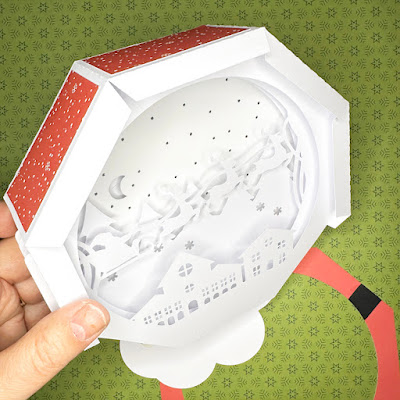
5. We are ready to assemble the inside of the shadowbox. Take the back panel with the moon and start and slide the tabs through the slit in the back on each side. You want the hole in the back piece to be on the bottom.

6. Repeat with the other inserts.


7. Once the inserts are in place we can adhere the final side in place the same as the other side.


8. Adhere the front Santa panel to the front of the shadowbox. I did this a few tabs at a time. Then your Santa is ready for some lights or if you prefer you can leave it as is.


Thanks so much for stopping by. Be sure to check out all of Lori's latest designs in her shop.
~Marcia

Monday, December 11, 2023

Snowman Lighted Shadowbox Decor - Lori Whitlock Blog Hop

 Hello everyone! It's blog hop time at Lori Whitlock.


Here is the blog hop order in case you want to start at the top or get lost along the way...

I was in love with the Halloween luminaries so when Lori came out with these lighted shadowbox Christmas decor pieces I knew I had to make one, or maybe more! You can purchase a bundle of all the Holiday shadowbox cut files Here. The bundle includes a Santa, Elf, Snowman, Reindeer, Turkey, and Nativity Scene. I created the Snowman Lighted Shadowbox Decor (SVGSilhouette) for the blog hop today.


Isn't he so festive! He is going to light up my Christmas buffet table this year. I purchased the smallest battery operated LED light string I could find at Micheals. The battery pack sits behind the snowman and the lights fit through a hole in the back. I was looking for white or silver cord because I was afraid a green cord would show through the paper. I did find a smaller watch battery powered light string from Tim Holtz Ideology at my local JoAnns but they only had multicolored light strings left. The Tim Holtz battery pack is less obtrusive and could be taped to the back.

Go check out all of Lori's latest Christmas designs. Right now Lori's designs are 30% off!!!!!  Use code Dec2023 to get 30% off all SVGs, Fonts and Commercial Licenses!


There is a FREE cut file available today only, No purchase necessary.


Finally, Want to win a gift card to Lori’s Shop? Enter here… 


Thanks so much for stopping by,
~Marcia

Friday, December 23, 2022

Polar Bear in a Hot Cocoa Stand - Lori Whitlock

 Hello everyone! 

I have a holiday card to share with you today. No, it's not too late to make and send holiday cards! New Years is a holiday so for me, it's ok to send a card after Christmas. I love to send holiday cards to friends and family as well as receive them. I especially love a box card that can sit on a tabletop or counter and doubles as home decor. This Hexagon Pop Up Card Hot Cocoa  Booth With Polar Bear (SVGSilhouette) cut file can be found in Lori's Store along with many other varieties of holiday cards. I used the new Echo Park Paper The Magic Of Winter collection. 


Stop by the Lori Whitlock YouTube tutorial for instructions on how to assemble the hexagon pop up cards. Don’t worry about how you will mail it, because these awesome cards fold flat and fit in an A2 envelope!

Thanks so much for stopping by,
~Marcia

Monday, December 12, 2022

Lori Whitlock Blog Hop + Giveaway

   Hello friends! It's blog hop time at Lori Whitlock!


Here is the blog hop order in case you want to start at the top or get lost along the way...


With Christmas approaching, I had to make some Christmas cards. Here is the Hexagon Pop-up Snowman ( 
SVG / Silhouette ) . I used Lori's newest collection The Magic Of Winter.


There's a sale happening in the Lori Whitlock SVG Shop!  Use code DEC2022 to get 30% off all SVGs, Fonts and Commercial Licenses!


Also, how about a free file!!  This file is free for today only!  No code or minimum required.


Thanks so much for stopping by! Have a great week,
~Marcia

Friday, November 27, 2020

A Lumberjack Santa Tuxedo Box Card - Lori Whitlock

Hello everyone! 

I have to admit, I slacked off in sending Christmas cards the past few years. Sometimes life is just so crazy busy! I want to rectify that this year. With Covid restrictions going back into place, it doesn't look like I'll get to see distant family for a while. Plus I should have lots of time on my hands since I won't be going out anywhere. I love making box cards because they do double duty as Christmas decor. Don't worry, these do fold flat for mailing! I was drawn to the new Lumberjack Santa Tuxedo Box Card cut file because I thought it would appeal to the young and old alike. This cut file can be found here (SVG / Silhouette ).

I used the Lori Whitlock A Lumberjack Christmas collection to create my card. The woodsy pattern papers are perfect! I added a just few stickers to embellish. Santa would look awesome in a plaid shirt too, I think. I'll have to make another card and try out that look.

There are lots of Holiday themed cut files available in Lori’s shop. Go check them out and join me in my card making frenzy. 

Supplies:
Echo Park A Lumberjack Christmas collection

Thanks so much for stopping by.
~Marcia

Monday, November 9, 2020

Santa 3D Snow Globe Box Card - Lori Whitlock Blog Hop

 Hello blogging friends!

It's time to hop again this month and see all the amazing Lori Whitlock creations the designer are making.


You should have arrived here from Michelle Starcher's blog for those hopping. Here is the hop order in case you are just arriving here and want to start at the beginning.

Marcia Dehn-Nix <--- You are here!

There are so many amazing new cut files in the shop, like this Santa 3D Snow Globe Card (  SVG / Silhouette )! There are many other snow globe designs so be sure to check them all out.... and there are more coming soon. I couldn't wait to make this one and get a start on my Christmas cards. I used the Echo Park A Lumberjack Christmas collection for my card. I love those plaid snowflakes.


The assembly on this one is a bit tricky and I would suggest you watch Lori's YouTube video tutorial.
Instead of folding to the side as other box cards do, this one folds down to lie flat for mailing.


There's a sale happening in the Lori Whitlock SVG Shop!  Use code NOV2020 to get 30% off all SVGs, Fonts and Commercial Licenses!


Also, how about a free file!!  This file is free for today only!  No code or minimum required.


Finally, how would you like to win a $20 coupon to Lori's SVG Shop! 


Just click on the Rafflecopter giveaway.


Thanks so much for stopping by! Have a great week,

~Marcia

Tuesday, November 12, 2019

Christmas Star Garland - Pebbles

Hello blogging friends!

Do you like to make some of your own Christmas decorations? I love adding homemade touches around my house... like this star garland I created with the Pebbles Merry Little Christmas 6x6 paper pad. These origami stars can be made into ornaments for the Christmas tree or added to a swag to decorate your fireplace mantle.


To make my star garland I selected a variety of 6x6 pattern papers from the Merry Little Christmas 6x6 paper pad.


The first step to making these stars is to fold and cut the 6x6 papers into pentagon shapes. There is a fabulous tutorial I highly recommend on how to fold the stars here.


Once I had all my stars folded, I tied them to my swag garland with some gold thread.


This is even a craft you could do with older children. Here are some closer views of the stars...


Thanks so much for stopping by! I hope I you will want to make your own origami star garland.


Supplies:
Pebbles – Merry Little Christmas Collection – 6 x 6 Paper Pad


~Marcia